I just want to share with you an opportunity to do some good this winter. Our church, East Coast Church is sponsoring it's second annual winter coat drive. We are collecting new and gently used coats in all sizes to be given to children in need in the area. If you are here in Jacksonville, please consider donating to this more than worthy cause. Clean out your closets and be a blessing to children this winter.
There are two locations to drop off:
Starbucks @ St. Augustine Rd and San Jose
Historic San Marco Theater in Downtown San Marco
Click here for more info

I'm no professional but, I'm passionate.
11.30.2010
all the trimmings (pt. 3)

To do this, I chose three branches I had in my pile of trimmings. If you like the fullness of the picture, I would use the same amount. However, if you would like something a little more full you can either use more branches or choose bigger branches.
I then used my handy little secret...floral wire. I got a whole spool of it from Wal-Mart for $2 and I use it for so many different floral projects. It is simply wire that easily bends and is coated with green plastic...to blend. I barely even used any for these crafts. One spool has lasted me for quite some time.
 Connect two of the branches using the floral wire. Wrap the ends of the stems, going between the two to ensure they stay together. Once you have the two secured, add the third. This is the time to determine the shape you want. If you want the branches to feather out more, wrap the stems at an angle. If you are using just the three branches then you are ready to jazz it up a bit. Or, if you want the super lush look, keep attaching the branches by wiring the stems together.
Let's recap here on the price...branches: FREE, ribbon: FREE (it came off a box of vase filler), wire: FREE (to me, $2 for those who need to pick it up) ornament: $1. Total: $1-$3! Come on, you have to admit that's pretty awesome.
If this door hanger just isn't quite your style, just wait. I have more ideas coming your way for my free clippings!
11.29.2010
all the trimmings (pt. 2)

So, my sister-in-law made this AWESOME wreath and I wanted to share it with you. She used a wire coat hanger, free Christmas tree clippings and twist ties!
Form the coat hanger into a circle. Lay your branches out onto the hanger and move them around and adjust them until they are just as you want them. Once you have your perfect wreath in place, twist tie the branches onto the hanger. She told me that it was easier to have them all laid out then attach them rather than attaching them one at a time.
Form the coat hanger into a circle. Lay your branches out onto the hanger and move them around and adjust them until they are just as you want them. Once you have your perfect wreath in place, twist tie the branches onto the hanger. She told me that it was easier to have them all laid out then attach them rather than attaching them one at a time.
Now, I used the clippings I got to make some decorations and I am going to share them with you...just be patient grasshoppa'! I just wanted to share with you my inspiration.
Click here for part 1
Click here for part 1
me encanta el tocino (I love bacon)
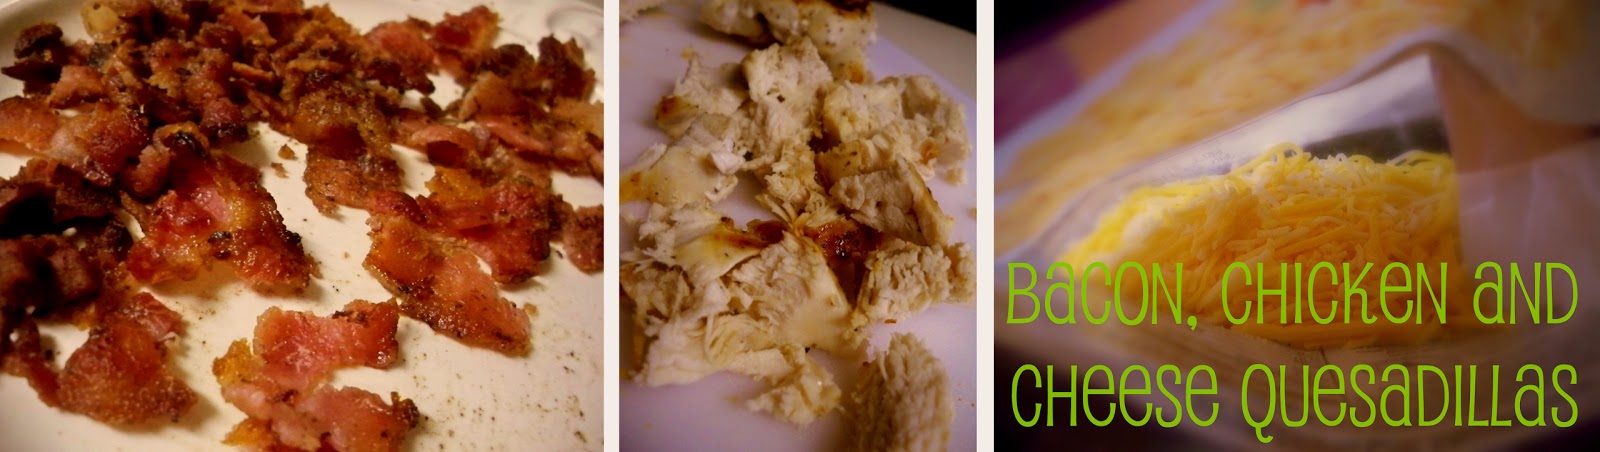
My wonderfully magnificent husband decided to make us some today for lunch. Might I just say "delicioso!" Here's how we did it

Ingredients:
2 flour tortillas per quesadilla
bacon pieces
cooked chicken pieces
shredded cheese
*optional: green onions, ranch dressing
We cooked ours on a griddle (got it for a wedding present...love it!). We first sprayed the griddle down with non-stick cooking spray. We put one tortilla down per quesadilla and added some cheese, the bacon and the chicken. Let the tortilla cook, letting the cheese melt. Add a little more cheese and the top tortilla. Carefully flip the quesadilla over, letting the second tortilla brown some. The two should stick together fairly well because of the cheesy glue holding them together. Once your tortilla is done, transfer to a plate and cut in fourths. Enjoy your tasty little treat...we sure did!
 Tips: Use smaller tortilla shells if you are wanting to cook multiple quesadillas at a time. Make sure your cheese goes all the way to the edges or you will get bites of tortilla shell. To make on the stove, simply use a frying pan coated with a thin layer of cooking oil or non-stick cooking spray
11.28.2010
this is a stick up

I had more canvases lying around from previous attempts at art, as I mentioned before. You may not have any just lying around, but your local thrift store just might! I used my spray white primer (again, LOVE spray paint) to cover the canvas. I found some left over orange spray paint from a wedding project that did not turn out so well. The can was almost empty so the canvases were not covered completely. I tried to get more paint around the edges and the bottom of the canvas. I was surprised at how good the light coat of orange looked.
I then laid out the decal on the two canvases. I positioned the tree at the bottom of one canvas and cut the decal where the two canvases split. I carefully pulled the backing off of the decal and stuck it to the canvas. The birds were not already on the tree, so I positioned the little guys just right. My husband and I both were actually surprised at how much more we liked the tree this way then we did when we envisioned it in our heads just on the wall. We hung the two in our bedroom above our dresser and are completely happy with the outcome! Get inspired, think outside the box, create something unique and spectacular!

all the trimmings (pt. 1)

If you are more of the artificial tree type, don't fret...just run up to your nearest Christmas tree lot and ask for some branches. Most lots are more than willing to give you as many as possible. These uses for the branches are endless. Use them as table decoration for your Christmas parties, as a vase filler, make your own door hanger or wreath (yeah, I'm going to show you how) or just lay them around the house for the magnificent smell! I must warn you, your hands will be a bit sticky after handling the tree branches. Do you use tree branches in your home for decoration? Where do you put them?
Click here for part 2
11.27.2010
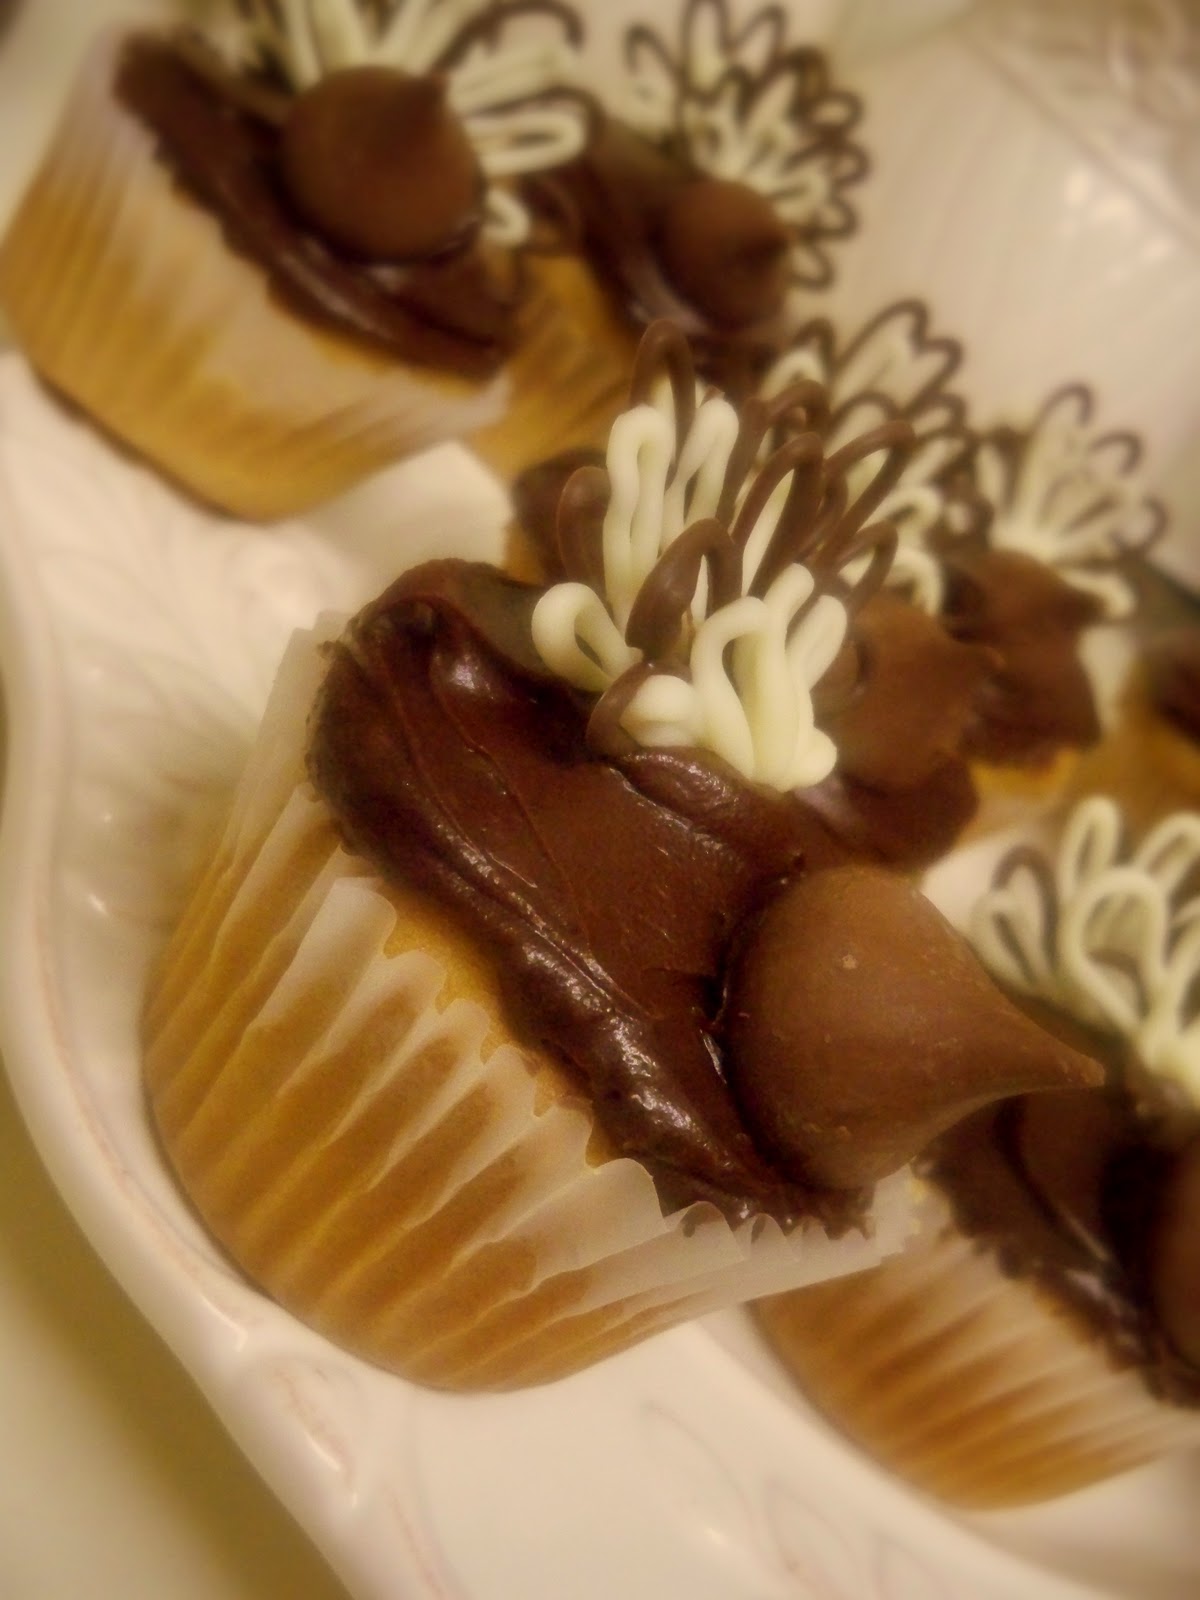
so beary cute

I started with cupcakes frosted with chocolate frosting. I then used melted white chocolate almond bark in a piping bag (if this is gibberish to you...click here) on a cookie sheet covered with wax paper.
I made two small circles and one larger one for each bear. I then made two half circles and filled them in for each bear to use for the ears. I put a miniature chocolate chip in the middle of the two smaller circles and a regular size one in the middle of the larger circle. I let those sit in the freezer for about five minutes. Once they were set I took them off the wax paper and placed them on the frosted cupcake. For the ears, I put them on upside down, so that the side of the chocolate you see is flat. How stinkin' adorable!
oh christmas tree...

Any whooo...I just wanted to share with you our Christmas tree. It's our first Christmas tree in our apartment and our first Christmas married...we're excited! My mother-in-law even bought us a cute little ornament that says 'Our First Christmas'. How stinkin' cute.
We got up early on Black Friday and waited outside Best Buy. We got a few good deals, walked around the mall and then headed home. We napped for a while then headed off to Home Depot. My husband got his tree there last year and we loved it. This year was no different! We wound up getting the first tree we looked at, brought it home and set it up. My husband bought a set of green, red and silver ornaments last year on Black Friday so, we used those. However, I needed to add my touch! I got some purple ornaments from Wal-Mart (24 for $5! Holler!). I must say, I love our tree! We have a few special ornaments (starbucks cups) but most of ours are standard, decorative ones. I can't wait to get ornaments with meaning behind them. How about you? Do you decorate with special ornaments or do you stick to a color theme? When do you put your tree up? Are you an artificial or a fresh cut?
P.S. I also took some branches...be on the lookout for my crafts using those little dandies!
11.26.2010
tasty taters
As I have mentioned before, I don't care for instant mashed potatoes. Unless, they are used to coat chicken...delicious and so many varieties! Anyways, I love 'real' mashed potatoes and just wanted to share with you the recipe my mom and I use (mine includes a little extra yumminess).
You will need:
peeled potatoes
salt and pepper
butter
whole milk (or half and half)
pot to boil potatoes in
 Peel your potatoes, how many you need will depend on how many people you are planning to feed. Cut up the potatoes into chunks and put in a pot to boil. Fill the pot with water, enough to cover the potatoes. Check potatoes with a fork to measure 'done-ness'. If you can easily stick the potato with a fork, they are ready. Drain all the water off. Next, add in milk or half and half, my husband likes fat free milk and the potatoes NEVER taste as good as they do when made with whole milk. I suggest always using whole milk, or half and half. For 2-3 servings, I used 1/2 cup of half and half...start with this and gradually add more until you get the creaminess you crave. Add in a spoonful of butter and some salt and pepper. Beat with electric mixer (or by hand) until most all lumps are gone.
 Now, my mom will add some butter on top and serve these tasty spuds. I, with my absolute obsession with bacon add an extra step. I fry up a few pieces of bacon, cut them up and add them into my potatoes. Oh, they are so delicious! My husband and I usually add some shredded cheese on top and enjoy!
Get inspired, experiment with your taters...create something delicious!!
You will need:
peeled potatoes
salt and pepper
butter
whole milk (or half and half)
pot to boil potatoes in


Get inspired, experiment with your taters...create something delicious!!
11.25.2010
give it up

Let me start off this post by saying
HAPPY THANKSGIVING!
I hope your day is filled with fun, laughter, family, friends, turkey, five-step mac-n-cheese, tasty desserts and of course giving thanks. Be sure to take time to thank those in your life who mean the most. Also, thank God for the blessings He's allowed you through out the year. I mean honestly, everyone has AT LEAST one thing that they can be thankful for from the past year. Even when it seems as though everything is going wrong in our lives we can always stop feeling sorry for ourselves and find at the absolute least one thing that to give thanks for. I love that we end each year with a day of remembering and being thankful followed by celebrating the biggest blessing of all, Christ. I hope each and every one of you have the best Thanksgiving ever followed by a profitable Black Friday and a Christmas filled with joy!
11.24.2010
blocks of love

I tore the edges of the squares to give the blocks more of a distressed look. I then decoupaged the paper (using homemade decoupage) onto the blocks followed by the letters. (check out how to decoupage...it's SO simple) It did take a little bit of time to complete, waiting for the decoupage to dry so I could turn the block over and do the other side. Though, I think it was completely worth it and costs less than $10!

11.23.2010
gobble these up
I started out with peanut butter cupcakes and vanilla and chocolate candy coating (I call it almond bark) in piping bags (if that means nothing to you, click here...it's the easiest thing ever!) Here's how I made these little guys!
Ingredients:
Chocolate frosted cupcakes
1 Hershey Kiss per cupcake
Candy coating in piping bags
Baking Sheet lined with wax paper
First, I made the tails. I piped out what looked to me like the NBC logo for the tails onto the wax paper lined baking sheet. I would recommend making them somewhat large. I made mine kind of small because I was worried they wouldn't fit into my canister. I piped the chocolate first and then added the white on top. However, you could easily switch it the other way. I then placed those candies into the freezer to harden. While they were hardening, I unwrapped my kisses. I put a small dap of icing on the back of the kiss and placed one on each cupcake. The kiss is the head, with the point being the beak...remember this when placing. I mean, you don't want a turkey with it's head pointing backwards or anything...unless you are going for the exorcist version of the holiday! Next, I took the candies out of the freezer and removed them from the wax paper. I placed them standing up behind the 'head' of my turkey. I made 2 'NBC logos' for each turkey, but one would have been fine. There you have it. A one of a kind, hand piped Thanksgiving turkey cupcake!

11.22.2010
ahhhhh....decoupage

First I made my own decoupage glue. There is a brand called Modge Podge, supposedly it works great. However, the price is not so great at all! I opted for a homemade version I found online. Ingredients: equal parts water and Elmer's glue. How simple and inexpensive. I mixed up my glue in a bowl but you could easily use a plastic cup (easy disposal). I was surprised at how little I actually used.
I was making a picture frame and wanted to decoupage squares of scrapbook paper onto it. I dipped the squares of paper into a bowl of water and placed it on the frame. I bent and folded the paper so that it would go all the way around the edges. I then brushed a layer of glue over the paper. I used a sponge brush, which is a black sponge on a rod (they are super cheap at craft stores). I did square by square the same, adding a layer of glue. I waited for the layer to dry and then continued brushing on glue one layer at a time. I probably did upwards of five layers of glue. I then added a few embellishments and decoupages over those as well.
Decoupaging was SO easy, I was surprised actually that I hadn't tried it earlier. This process could easily be used on so many different surfaces. Since I made just a frame I let the decoupage glue be my sealer. However, if you were going a whole piece of furniture you would want to add a layer of sealer on top to protect the furniture.
11.21.2010
it really stacks up


 Ok, I am SO excited to share this project with you! I saw the idea on Thrifty Decor Chick's blog and could not wait to try it myself. I am so incredibly happy with the outcome and quite proud of the minuscule price tag! I headed down to my local Dollar Tree and picked up two glass candlestick holders, they had about a zillion of them. I also picked up a tall vase that sort of swoops out at the top...I couldn't resist. I took my fabulous finds home and removed the price tags. This was a bit of a chore though, my prized goo gone worked quite well! I heated up my glue gun and got to work. I put a line of glue around the top rim of the candlestick. I put the vase on top of the candlestick and pressed down. I stood back and was in absolute awe of my favorite new piece of decor.
I had some packages of leaves left over from my finishings of fall post and just filled up the vase with those. Repeating these similar items makes for a theme, as I mentioned before.
I had bought two candlesticks and knew just what I wanted to do with the other. I took the middle vase from my finishings of fall post and added the candlestick to the bottom as I did with the other vase. I loved it! I mean, I loved the grouping of vases before but I really love it now. Giving the middle vase height really adds interest.
Let me just share with you what I think may be the best part...my first vase total cost: $3 ($2 if you don't include the filler) and my grouping remake total cost: $1! I hope this inspires you to get creative because these vases are sahhh-weeeeet!
11.20.2010
finishings of fall

As I mentioned in my last fall decor post, I got some packs of fake leaves from Dollar Tree. That store is my favorite for getting odds and ends. Especially at Christmastime when I make platters to take places, they have some pretty cute ones that I don't mind leaving behind because they only cost $1! We also were able to completely fill up two boxes for Operation: Christmas Child from there for about $20.
Anyways, back to fall and decor and pretty and stuff! So, I bought three round glass containers. They are the kind that you might put a pillar candle in. I loved how simple they were and knew that I could get some good use out of them for more than one season. I also bought some leaves. I wound up using two packages of leaves to fill up the containers. That makes this fall decor $5! SAH-WEEET! I originally planned on decoupaging these little bad boys but, that didn't happen. Plus, I couldn't reuse them in an other season if they were covered in leaves.
I placed it on the breakfast bar between our kitchen and living room. I had been given a FAMILY decoration for my wedding and I love it. I keep a picture of both mine and my husbands family right next to it (in unfinished wood frames that I spray painted 'oil-rubbed bronze' to match the word). I used the leaf filled vases as the backdrop for my FAMILY. It looks so good, if I do say so myself! I think this project is a great way to finish up my fall decor. I must admit, I do have about a million other ideas for fall decorations but, they will just have to wait until next year.

11.19.2010
loving free stuff
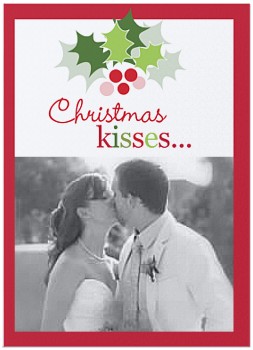
No Mistletoe Necessary Christmas 5x7 folded card
Make a statement with custom Christmas cards at Shutterfly.
View the entire collection of cards.
55 of these babies...absolutely free! Oh it pays to redeem coupons!
55 of these babies...absolutely free! Oh it pays to redeem coupons!
holiday cheer the easy way
Those who know me best know that I have quite an addiction to a certain photo project site. Shutterfly. I've used Shutterfly for oodles of projects from Mother's Day to my own wedding. Well, now that Christmastime is upon us, I plan on using them for my Christmas Cards as well. I wanted to use a picture from my wedding especially to send to those who were unable to attend our wedding. I was a little worried as to how a wedding picture would fit into a Christmas card...but, Shutterfly totally came to my rescue! When browsing through their Christmas photo cards I found the perfect one for us!
 It's title is 'No mistletoe necessary', and reads 'Christmas Kisses...and best wishes'. How absolutely perfect, our wedding picture looks great on the card. (the picture on the card shown to the left is not us! We're young, but not that young!) Not to mention we can put more pictures on the inside of the card. Anywhere from one extra picture inside all the way up to 9! What?! They thought of everything!
Shutterfly also does address labels with a photo on them. I used these for the address labels on our wedding thank you cards. I absolutely loved being able to send a sneak peak picture from our wedding to all those who sent us gifts and couldn't make it. Even those who did attend the wedding commented on how much they loved the address labels! Score!
My absolute favorite thing about Shutterfly is that they are CONSTANTLY sending me offers, discount and coupons. I honestly don't think that I have bought anything from there when I haven't used a discount of some kind. I think my addiction is totally justified by the awesome-ness of the site alone!
If you're a blogger, I have an AWESOME deal for you. You can get 50 free Christmas cards just for blogging about it! Now that is an ultimate score! Just go here to find out more about it.
a little different than normal
Now, this post is a little different than my last ones. No super cute home decor craft, no yummy recipe to enjoy. Just a good deal. So, found out about two sites RueLaLa and Modnique. These are basically online outlets for name brand goods. I pretty much visit them everyday to see what new items they have and how incredibly cheap they are!
Both of these sites are 'member only' meaning that you it's totally free you just have to give them your email address. At RueLaLa you will need my email address, which clicking on the link will add it in automatically for you. I have found some super great deals on these sites. In fact, RueLaLa is having a sale on Vera Bradly brand items right now! I can't believe how low the prices are on these bags and wallets. Each designer is a 'boutique' or an 'event' and they close eventually, so don't wait...go get shopping!
At Modnique, until November 30th you can use the coupon code STAR to get a $10 credit towards your purchase! Plus, when you sign up you automatically get a $5 credit. Hello?! That's $15 handed to you!
Check it out, get some great gifts!
peanut buttery cupcakes

I found this recipe online and was so eager to try it. I do not like peanut butter but my husband and most everyone else in the world does! So, I tried it, peanut butter cupcakes.
Ingredients
1 box yellow cake mix
1/4 cup vegetable oil
1 1/4 cups water
3/4 cup creamy peanut butter
3 eggs
Follow directions on box for making cake mix. After your regular mix is made add in the peanut butter and beat in until smooth. You can make a cake or cupcakes. I chose cupcakes. I lined my pans with cupcake papers and used my ice cream scoop to fill the pans. I must say, the ice cream scoop worked perfectly for filling the papers just the right amount. Bake the cupcakes as directed according to box directions. Let cool and ice.
Try spicing this simple recipe up with your own ideas. Add chocolate chips to the mix before baking. Try putting a Reese's in the bottom of each cupcake liner before filling for a special surprise! Get inspired, create something peanut buttery!
11.18.2010
double duty decor

Oh, I just LOVE fall decorations. ( as I may have mentioned in a previous post!) They are so warm and cozy and pretty and stuff! While in Wal-Mart, gawking at the Christmas stuff I found the fall decor sale isle. I was in heaven. Remember those pillows I made from $2 place mats and napkins? They are on sale for $1.50! I have been wanting some (fake) fruits or something to fill up my glass vases on my 'crate' idea shelves but just don't want to pay the crazy price for them. Good news! Wal Mart had their vase fillers on sale! They had a few different ones with different things. I got the dried fruit mixture. The main reason I got this one was because it had red berries, pine cones, red fruits and leaves in it. Hello?! Double duty, fall AND Christmas decorations could be had from this little mixture that only cost me $3! I also bought two stems of leaves for $.75 a piece.
When I got home, I took a few leaves from the stem and cut them apart. I opened the vase filler mix, threw in the leaves and mixed it around a bit. Then, I literally dumped it into the vase, right out of the box! I played a tiny bit with the little amount at the top, just to make it not look so 'dumped in'! I then took the rest of the leaved off of the stems and cut them all apart. I put them in a pile on the floor and hand-tossed them a bit. Then, I put them in the smaller of the two vases and voile! A beautiful fall display I had. Don't get too heartbroken, I still have my candy up there, I used a candy dish my mom gave me for Christmas last year (on sale at Cracker Barrel after Easter). (long, drawn out, dramatic sigh) I love fall I can't wait to reuse some of these things to decorate for Christmas. Fret not, I will share those with you as well when the time comes (I have to decide which of my seventy-nine billion ideas I am going to go with). Get inspired, create something...fall-ish!

11.17.2010
a classic all grown up

 Once I had the dough mixed I added some miniature chocolate chips. I had regular size ones too but I chose the cute little bitty ones! I put the dough into a 8x8 inch glass pan, the recipe called for 9x13 but I had cake in that one! With the difference in pan size I did have to cook it a little bit longer. The recipe called for a layer of chocolate made from melted chocolate chips. I wanted to make sure my husband would like the cookie bar before I used extra chocolate chips, so I skipped that part. Once the dish was made I simply cut it up into squares.
My husband loved the cookie bars! What a success! Next time I will add the layer of chocolate, it just looked so pretty!
11.16.2010
a valance-ing act

The process of making the valance was extremely similar to making the curtains. I first cut the piece of fabric in half so that I could sew it together to make it long enough. I placed the two pieces of fabric facing one another and sewed one side (much like I did with making pillows.) I then opened up the fabric and had one long piece of fabric that needed hemming. I ironed down the flap created by sewing together the two pieces of fabric.
At this time my beloved sewing machine decided to throw a ridiculous temper tantrum and would not work for me. I had to result to the alternative...my glue gun! I simply glued where I would have sewn. I glued the hem on the bottom, the side hems and even the pocket for the rod. (For more detailed instructions, check out how to make curtains here). I wanted a little more interest on the valance, so I added some gray ribbon along the bottom edge, this was secured with hot glue as well. There it was, my finished valance with no thread showing!
We bought a double rod so that we could hang both the valance and the curtains. I hung the curtains quite a few inches above the actual top of the window, this gives the effect that the windows are taller than they actually are and make the ceiling seem higher as well. I pulled the curtain rod out as long as it would go and mounted it a few inches from either side of the window. This gives the effect that the window is wider than it actually is.
Like I said before, no one likes naked windows. Why not add some pizazz to your newly dressed up windows? Get inspired, create something snazzy!
11.15.2010
some pretty for your hair
 |
| www.piccadillypics.com |
 You will also need a normal glue gun with some glue sticks. If you don't already own one, I bought mine at Wal-Mart for about $5 and I love it, it works great! Then of course, you will need your flowers. Most artificial flowers come in stems with more than one bloom though, some do come with a single bloom. Choose whichever you would like. You can use the multiple blooms to make clips for your friends or as gifts or spend a little more and get a single blossom with exquisite detail. Be sure to pay attention to the size of the bloom and be sure it is appropriate for the wearer. Some may not want to wear a huge peony in their hair while tiny cherry blossoms may get lost in anothers hair.
Once you have all of your supplies, take the blossom off of the stem. Position it on your clip or barrette to see where it best fits. Try turning it, adjusting and adding leaves to try and cover the barrette. You may even have to move the barrette off center from the blossom to cover it all of the way. Once you have figured out how you like it, put a line of hot glue down the metal clip. Place the blossom or leaf onto the glue. Glue anything else in place that you want on the clip. You may have to glue a petal or leaf down to fully cover the clip.
 Get creative with your clips. Use a few of the same small flowers in different colors to add interest. Include a small leaf peaking out from under your flower. Maybe you want mostly greenery and only a small blossom on your clip. Add feathers of rhinestones to your flower to really bring some excitement! Instead of using hair barrettes use brooch pins (used on the back of pins, have a flat surface to attach something to) and add some interest to an old bag or bring life to a boring sweater or dress. Just get inspired and create something pretty (oh, so pretty).
11.14.2010
a classic in it's sunday clothes

One of the treats our baristas enjoyed were peanut butter cookies. I used the regular frozen cookie dough...that little dough boy sure is a big help! Hint Hint: you can find coupons for the cookie dough here.
I cooked them as the directions instructed, I even did the fork markings in the top if the cookies. Tip: chill the dough before marking, the fork will not stick as bad. After baking the cookies I allowed them to cool. I melted some almond bark (great for garnishes). I then dipped one side of the cookie into the chocolate. I mean, this is not a mind blowing, earth shattering recipe here though, they sure did look good. Get creative with your cookies, drizzle chocolate over them, dunk in chocolate and white chocolate, get inspired...create something unique and yummy!
11.13.2010
all hot and chocolaty
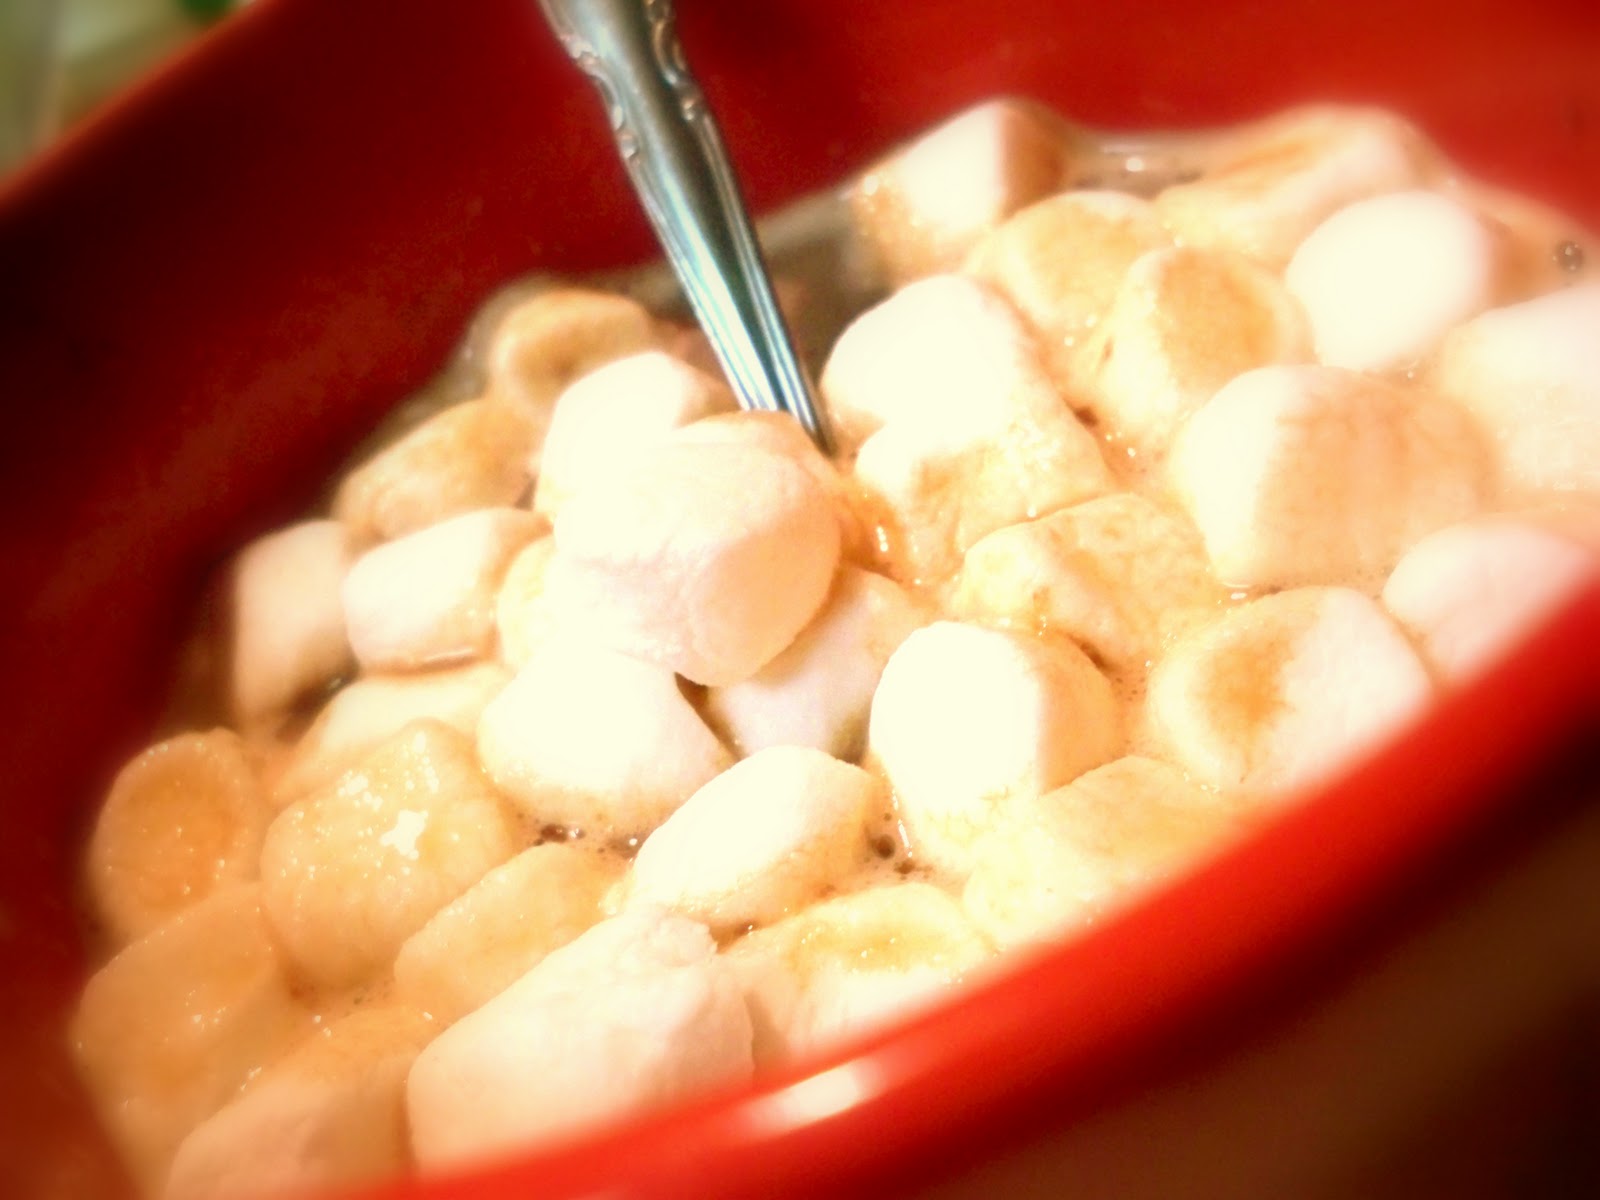
I began my experiment, by putting milk and chocolate syrup in a pot on the stove. I decided I would add a tiny bit of vanilla extract to the mix and I also decided to add some cinnamon (my favorite!!). I let the mixture come to a boil the poured it into my cup and added a packet of hot chocolate mix. I was shocked at how good it tasted! Then I started looking online for a recipe...I know, a little backwards...but, it's how the story goes! I found this one and was sort of proud of myself for coming so close to the recipe! Best part: this one is made in the microwave! Give it a try, drink it in a Starbucks mug!
11.12.2010
it's a window...PSYCH
 Our bathroom is not the biggest bathroom I have ever met. Being in an apartment, it is connected to our neighbors bathroom, which means no windows and no natural light. The walls are so white and so boring, it kills me! We got a bold shower curtain to try and liven it up some. Though, the curtain is white with a graphic tree on it in brown...once again, more white! We used orange, yellow and brown towels to bring some color too. However, I just wasn't satisfied with the result. I happened to have a canvas that I had painted a few years ago. The colors did not match our scheme and I really didn't even like the painting. So, I went out and got some spray paint (I love using this stuff..see), I got white primer and oil rubbed bronze. Now, you may not have an old painting lying around but I am sure your local thrift store might! Canvases are expensive, even with my beloved half off coupons!
I first sprayed the edges with the bronze. I knew that I wanted to make a faux window so I sprayed a 't' down the middle. I did not worry too much about how perfect it was, I was going to be covering the imperfections later. I let that coat dry then broke out my blue painters tape. I taped off my window. Remember, you are covering with tape what you want to show when you are done. What is covered is what will be left the same. Once my tape was on, I sprayed the left over with the white primer and let it dry. I then painted the four squares with a light color paint.
You could not take off the paint and have a window pane. I wanted a little something extra on mine, though. I left the tape on and painted a branch coming from one side of the window. I made sure that the branch extended into all four areas of the window. I wanted some color in the painting so I chose yellow. I took the end of a marker and dipped it in yellow paint. I then started from closest to the branch and made dots. I used a small paint brush to make the smaller dots. This is just how I chose to personalize my painting you could maybe try a scene painted (or printed out and attached) first then the panes of the window painted. Get inspired and create something marvelous!
I was quite satisfied with the outcome of my little window. It now hangs in our bathroom above a towel bar.
11.11.2010
sweet nothings

You will need:
Almond Bark (chcolate used for candy making, found in the baking isle)
Sandwich size plastic bags
Microwavable container
Spoon
Wax Paper
First, you need to make an icing bag. Simply cut a corner of the plastic bag off. The higher up on the bag you cut the larger the hole will be, meaning more will come out. The closer to the corner you cut the smaller the hole will be, meaning the amount that comes out will be smaller. The Almond Bark comes in squares. Put one square into the microwavable container and microwave for 30 seconds. Stir the chocolate and if it needs, microwave for a little longer. You want the chocolate to be completely melted, like icing. Spoon the melted chocolate into the plastic bag and squeeze it all into the cut corner.

 Now, pipe whatever you would like onto the sheet of wax paper. Helpful Hint: line a cookie sheet with wax paper to make it easier to transport your garnish creations. Try using white chocolate as well to add some interest. Once you have your creations piped, place them in the freezer to harden. They really only need a few minutes in the freezer to harden fully. Take the candies out of the freezer and peel off of the wax paper. They will come off very easily. If you made small, delicate designs be sure to be gentle. You can store the candies in an air tight container at room temperature. If you don't like how they turned out, melt them back down and start over!
I was practicing for my thanksgiving cupcakes but you can make practically any shape you want. I played around a bit with the chocolate and tried some different designs out. These yummy candies could be served alone or used to garnish cakes, cupcakes, pies, drinks, ice cream, anything! Let your imagination run wild with this SUPER easy idea. Practice letters with children by making candies of the letter. Monogram cupcakes or cookies for a special event or wedding. Get inspired, create something yummy!

11.10.2010
fall into cheap floral

This is my first year in my own house for Thanksgiving and I don't have much space so, I am trying my hardest to get smaller things that will make the most impact. For instance, I needed throw pillows so I got fall themed place mats to make those (find out how I did it here and here). It's killing two birds with one stone (except no birds were harmed). I also used fall colors in the floral arrangements I chose to display (you can see some here).


I know this wasn't a mind-blowing idea but I do hope that it at least inspires someone to create (or recreate) something beautiful!
11.09.2010
wee little pizza

My husband and I have been married for three months yesterday! We are trying to save up money for the Christmas season (absolutely, hands down the BEST time of year) by eating in more often, We both work nights and are hungry when we get home. Though, we just don't want to go through all the effort of cooking a meal and cleaning the dishes at 1:00 in the morning! My husband remembered a little meal his mom used to make for him and his siblings. We tried it and to my surprise I liked it, I am quite a picky eater! I love this recipe, I love how simple it is and I love how clever it is! This is easily a meal that children could help out with!
What you need:
English Muffins cut in half (one muffin makes 2 mini pizzas)
Spaghetti or pizza sauce
Shredded cheest
Your favorite pizza toppings
Preheated oven to 450
Cookie sheet
Lay the English muffin halves on the cookie sheet. Spoon sauce onto the muffin. Sprinkle cheese and other toppings onto muffin. Bake until cheese is golden! (we never really set a timer but rather watch them)
11.08.2010
unify your ideas

My two smaller vases, I bought at Wal Mart in the floral isle for a buck each! I then used double sided tape to attach a brown ribbon around it and covered he seam with an orange flower (that I got at Wal Mart). I loved these small ones, they are so fun! For the larger vase I bought a glass decanter, also from Wal Mart for $3 I believe. I also used double sided tape to attach a ribbon to the neck and used some different flowers to jazz it up! I loved how these looked when finished. They are actually what I use to decorate my 'crate' idea shelves!
Subscribe to:
Posts (Atom)