I have some seemingly bad news my sweet bloggies. Two weeks ago in church my pastor proposed to our church that we fast for 21 days. Some people are doing the Daniel fast, where you only eat fruit and vegetables. However, others are simply choosing something that they 'can't live without' and fasting from that. Instantly God laid on my heart exactly what I needed to fast from...this blog.
Now, it's not because this blog is a bad thing or that I don't completely and utterly love every one of you bloggies. The purpose of a fast is to get closer to the Lord and this blog is one thing that takes up A LOT of my day and my thoughts. So starting today, for 21 days I will not be posting or compulsively checking my view stats and looking up new projects and thinking what my next post could be about. It will most certainly be HARD as all get out but, I know the Lord will satisfy me more than I could ever desire.
I love you my sweet, faithful bloggies and will miss you dearly. Don't forget about me!
See you Valentine's Day!
P.S. Don't forget to spread the word about Simply Unique Boutique. Everything in the shop is handmade, it's all one of a kind and all the profits go to a good cause. The store opens February 1st!

I'm no professional but, I'm passionate.
1.23.2011
1.22.2011
american fried
 One food I have quite a weakness for is french fries...or America fries since I love America! I'm not a huge fan of spicy, seasoned, curled, twirled, lopp-de-looped fries...I want nice, plain, salted and fried up taters!
Well, God was SO looking out for me when He gave me my husband. My sweet hubby LOVES to eat homemade fries and even better he likes making them. I think, in fact he is quite perfect.
Well, this week Winn Dixie had 5 pound bags of potatoes buy one get one free. We now have 10 pounds of potatoes in our house...with only two people living here! Just yesterday Matt (the hubs) decided to use up some of the potatoes and make homemade
I know there are some of you out there in blog land saying 'DUH, everyone knows how to make fries' but, I also know there are some of you out there who just haven't quite gotten the courage to try to make your own. So here it is...the day to make some American fries!
1.21.2011
crafting coupons
Here they are, the coupons for your craft filled weekend!
A.C. Moore
Michael's
JoAnns (I got a TON of fabric today, all from the clearance isle, which is half off the clearance price!)
Also, at Shutterfly you can get an extra 20% off of your order by entering the code: ZHX4-DR8W-VDVH-E85AJK at checkout! This offer is good until January 26, 2011 (my little sister's 17th birthday).
BIG NEWS!

A few weeks ago we had a missionary come and speak at our church. The missionaries, JJ and Melissa Alderman are a young couple with a vision to reach the people of Togo, West Africa. They are working towards building a camp for the youth called Togo Palms. You can find out more about their efforts at www.togopalms.org.

Instantly, I knew I needed to do something to help in raising the support. After praying about it, the Lord kind of smacked me in the forehead and said "duh!" Here's the big news...(drum roll please)
1.17.2011
rrrruffles have rrrrridges
By the way...I love those chips!
I shared with you my newest creation, my apron with my fabric flowers on it yesterday. I added a ruffle to the bottom of my apron and wanted to share with you just how I did it.
First I took a scrap of fabric twice the length of what I wanted it to be when finished. I was using it for my apron which was 20 inches long so, I cut a piece of fabric that was 40 inches long. If you want a SUPER tight ruffle, go with a longer piece.
I then sewed a hem down one side of the fabric. This will be the bottom of the ruffle. I was attaching my ruffle to the skirt, so I didn't need to hem both sides.

I then hemmed the two ends of the fabric.

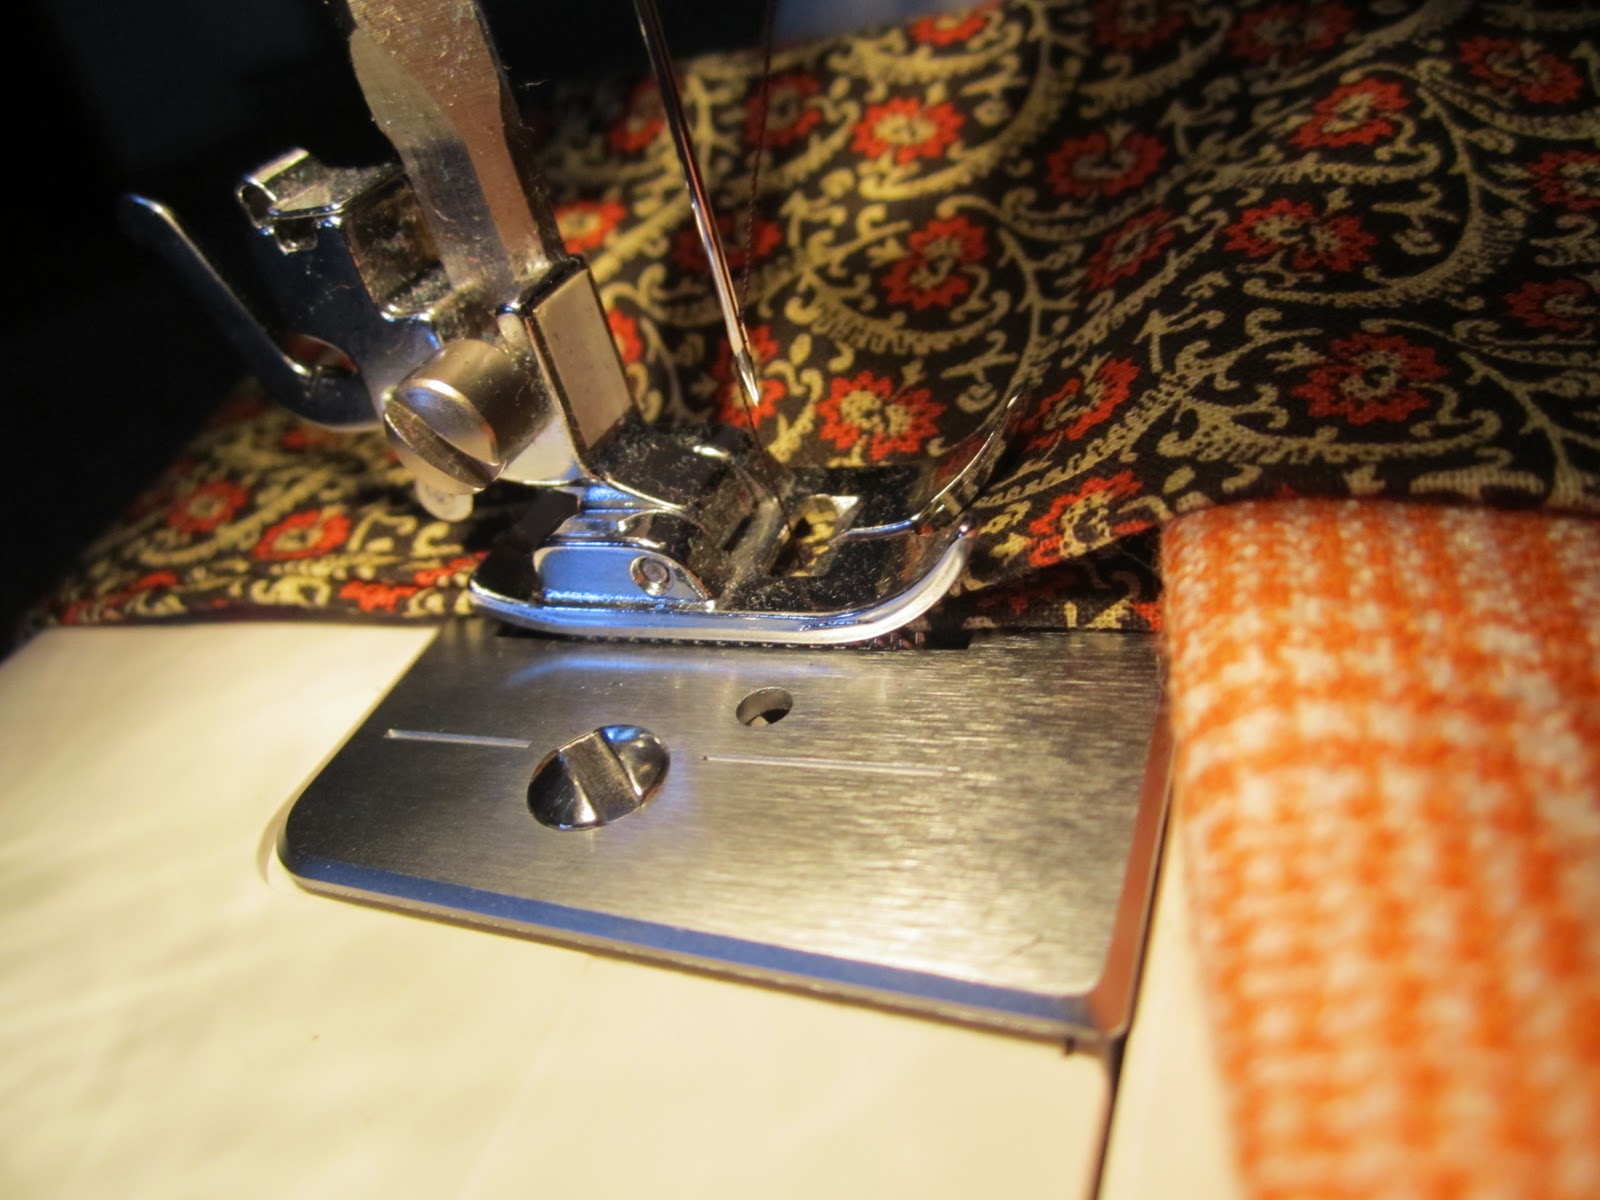
Next, I set my sewing machine on the biggest stitch setting. Remember, a stitch is just a straight line...I forgot that and wound up having the take the whole thing out and redo it...ugh!

All righty, here is the ruffling part...take one of the threads hanging out of the end of the fabric and pull. I had to scrunch, pull, tug, bribe...but, I got to it! I just scrunched it up shorter than I knew I wanted it and then pulled it back out to exactly the right size.

To attach to my apron, I only sewed up three sides of the skirt portion of my apron. I used the open end as my bottom and tucked the unhemmed side of the ruffle in and pinned it in place.

I then just sewed straight down the bottom of my apron to attach the ruffle and close off the apron. There it is...the easiest ruffle EVER!

Go HERE to see the finished apron, I am kind of, sort of, probably completely in love with it!
I shared with you my newest creation, my apron with my fabric flowers on it yesterday. I added a ruffle to the bottom of my apron and wanted to share with you just how I did it.
First I took a scrap of fabric twice the length of what I wanted it to be when finished. I was using it for my apron which was 20 inches long so, I cut a piece of fabric that was 40 inches long. If you want a SUPER tight ruffle, go with a longer piece.
I then sewed a hem down one side of the fabric. This will be the bottom of the ruffle. I was attaching my ruffle to the skirt, so I didn't need to hem both sides.

I then hemmed the two ends of the fabric.

Next, I set my sewing machine on the biggest stitch setting. Remember, a stitch is just a straight line...I forgot that and wound up having the take the whole thing out and redo it...ugh!
All righty, here is the ruffling part...take one of the threads hanging out of the end of the fabric and pull. I had to scrunch, pull, tug, bribe...but, I got to it! I just scrunched it up shorter than I knew I wanted it and then pulled it back out to exactly the right size.

To attach to my apron, I only sewed up three sides of the skirt portion of my apron. I used the open end as my bottom and tucked the unhemmed side of the ruffle in and pinned it in place.

I then just sewed straight down the bottom of my apron to attach the ruffle and close off the apron. There it is...the easiest ruffle EVER!

Go HERE to see the finished apron, I am kind of, sort of, probably completely in love with it!
1.16.2011
cookin' up something pretty

I am going to show you how I made the skirt for my moms apron. As I told you before, I do not do well with patterns so, I always have to make something twice before I can tell you how I did it. I whipped one up for myself and wanted to share it with you.
(for reference, on my project fabric 1 = orange plaid, fabric 2 = brown floral. Feel free to do whatever patterns or colors you want)
You will need:
2 rectangles of fabric 1 approximately 20" x 13" (Hold a measuring tape up to you and see if you need it larger or smaller...use what works best for you!)
1 rectangle of fabric 2 approximately 6" x 60" (You will fold the rectangle in half giving you a 3" band, if you want a different size, adjust to your liking) The fabric I used was only 45", so I cut another 15" and sewed them together
Sewing machine
Coordinating thread
Any embellishments you like (I used my no sew flowers and minimal sewing flowers) I also added a little ruffle to the bottom, I will show you that tomorrow, this tutorial is for a SUPER simple apron.
Also optional - If you want to customize the apron a little more with pockets or painting with a stencil maybe, do this to one of the rectangles of fabric one before you sew them together.
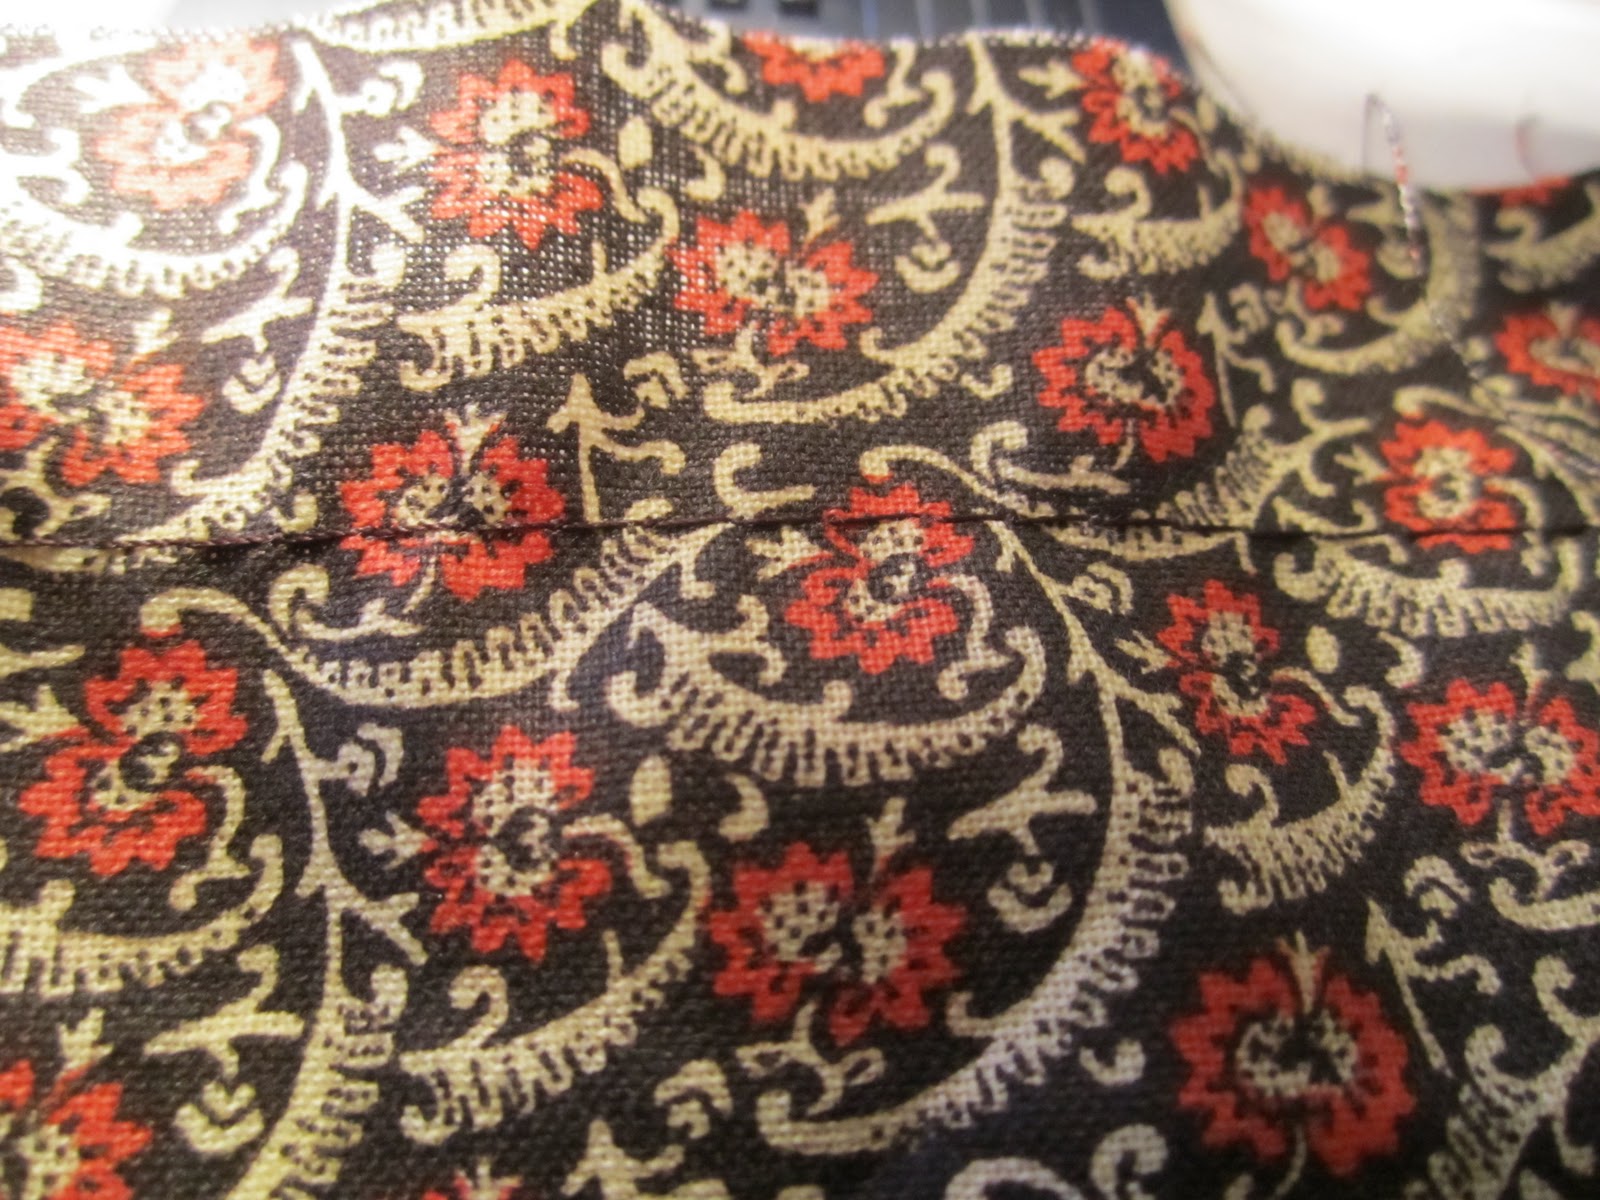
Lay the two pieces of fabric one down with the pattern facing each other. Sew around the bottom and two sides, leaving the top open to turn it right side out. Turn the rectangle right side out

Take the large rectangle of fabric two and iron it in half long ways as well as ironing a hem on each side. You don't have to iron it but, it makes it a million times easier then trying to make sure you have it pinned perfectly in place the whole time.

Take the right side out rectangle of fabric one and place it between fabric two. Be sure to center it so that you have the same amount of fabric on either side of the rectangle of fabric one. Pin the fabrics together

Sew the rectangle of fabric two closed, going straight down the strip of fabric. This will close the band and attach your skirt.
And there you have it!! A sweet and simple apron perfect for everything! Now, add your embellishments as you wish. Remember, I will show you how to add the ruffle tomorrow. I LOVE my apron with my cute little flowers!
 ” />
” />
blossom - episode 2

These flowers can be made as big or as small as you want. You can glue a pin to the back or a hair clip, or even attach it to a headband for a super cute look. Use them as embellishments on different projects. Just add them everywhere!
You will start off with the same materials you did for the no sew flower (cut your fabric into circles) and just add to that list a needle and thread. Cut one smaller circle of a thick fabric for the base.

Start off by taking your fabric (the fabric I chose was printed on one side and I wanted the printed side to show most, so I started off with the printed side down) Fold the circle in half, then half again.

Now, position the point of the petal in the center of the base. Stitch from the bottom of the base through the point of the petal. Stitch back down through the point of the petal and the base.

Continue doing this with the remaining petals. I did three different fabrics and decided to layer each one separately. You can mix the patterns up, keep it all simple...do what ever you want!

Once you have all your petals on, cut a small circle out of a coordinating fabric and stitch it onto place in the center of your layered petals.

1.15.2011
blossom

I love that these flowers can be attached to anything. You can attach a pin or a clip to the back of these flowers and use them in a million and a half different ways. Or, just simply stitch them right on to a project to add some pizazz!
Well, I found a super simply tutorial over at Little Miss Momma on how to make these no sew flowers. I followed it and am SO pleased with the outcome. I used three different kinds of fabric on my flower, you can use more or less...anything you want!
First, cut out circles from your desired fabric(s). These circle do not have to be exact in any way shape of form. How many circle you will need depends on how full you want your flower to be. Be sure to cut a smaller circle out of a thick fabric to act as your base.
Next, take one circle and scrunch it up by grabbing the center.

Dap hot glue on the scrunched tip of the petal and glue it to the middle of the base you cut out earlier

Continue doing this and filling it the base with the other circle you have cut out.


1.14.2011
craft couponing
So, I get these coupons mailed to me each week and I feel so bad when I don't use them. I feel as though I am wasting them when I don't get to use them. Then, I had this great idea...why don't I just share them with my beloved bloggies?! Duh!
I've got three links for you. Follow the links to print out the coupons.
Michael's Coupons - begins 1/16/11 20% off ENTIRE purchase on 1/15/11
A.C. Moore Coupons ( only 1/15/11 ) ( 2 begins 1/16/11)
Enjoy!
I've got three links for you. Follow the links to print out the coupons.
Michael's Coupons - begins 1/16/11 20% off ENTIRE purchase on 1/15/11
A.C. Moore Coupons ( only 1/15/11 ) ( 2 begins 1/16/11)
Enjoy!
help a sista' out
Ok, so I shared with you the other day how I need you to vote for me daily on Shutterfly. They are having a contest for the best gift ever. So do that here....now....ok, now I need you to click the link below and vote for my sister. She is entered in the "Eye of the Beholder' contest. The prize up for grabs is a trip to Hawaii! What?! Yes, please...I'll take two actually! The picture she entered is one from her wedding day...one of my favorites. Remember you can vote once a day...so get on that....please!!! She entered twice..so, you can vote for both...I don't mind!

The picture was taken by Lauren Mason over at Piccadilly Pictures. The wedding was held in Siesta Key, FL right on the white sand beaches. Head over to Piccadilly Pictures Facebook Fan Page if you want to see some more photos of the big day. The folder name is Christy + Harry are Married!


The picture was taken by Lauren Mason over at Piccadilly Pictures. The wedding was held in Siesta Key, FL right on the white sand beaches. Head over to Piccadilly Pictures Facebook Fan Page if you want to see some more photos of the big day. The folder name is Christy + Harry are Married!
with the band

I am so sorry I haven't posted this earlier, you see when I made something I make it with no pattern. So, the first one is usually the trial, seeing what works best. The second one I make is the one that I really know what I'm doing and can explain. I had no reason to make a second arm band...until now! My little sisters friend asked for one, so I said 'of course, I need to share this with my bloggies'!
Fabric 1: Zebra
Fabric 2: Green
What you need:
Cut out of Fabric 1:
(2) 5 1/4 x 6 1/2 inch - we'll call these smaller panels
(2) 5 1/4 x 7 1/2 inch - we'll call these larger panels
Cut out of Fabric 2:
(4) 6 x 2 inch - we'll call these arm bands
Other stuff you need
2 inch velcro strip
4 inch velcro strip
Sewing machine
Coordinating thread
What to do:
First sew the two smaller panels together as you would a pillow (pattern facing pattern, inside out) leaving one side unsewn, this will be the bottom. Turn the finished panel right side out

Next, sew one side of the 2 inch strip of velcro onto the middle of the top of one of the larger panels. Sew the two larger panels together as you did the smaller panels, leaving the bottom unsewn. Turn the finished panel right side out

Sew the second side of the 2 inch strip of velcro onto the middle of the top of the finished smaller panel.
Set your two finished panels aside.
Sew one strip of the 4 inch velcro to one end of one of the arm bands. Sew one of the unused arm bands to the newly velcro-ed arm band as you would a pillow, leaving the bottom unsewn. Turn the newly finished arm band right side out. Do the same for the second strip of 4 inch velcro. Continue to make the second finished arm band.

Clasp the two arm bands together using the velcro. Lay the larger finished panel down with the velcro facing up.
Lay the smaller finished panel on top of the larger finished panel also with the velcro facing up.
Place the clasped arm bands between the two panels, centering on one side (one side of the clasped arm bands will be sticking out a lot, but we will take care of that).
Stitch down the side you centered the bands on and then across the bottom of the panels.
Now, tuck the end of the arm bands that is sticking out a lot into the pouch you just made. Be sure to leave a small amount hanging out to attach.
Stitch up this side as well.
Turn your case right side out.


1.13.2011
L is for...
LOVE...duh! I told you I had some Valentines projects in the works and I finally finished the first one! I saw this idea on a blog that I read called Dittle Dattle, she did a spring time version. She also used old wall molding she had left over...I did not. I went to Micheal's and got a package of 20 different wooden plaques (squares) for $5! I used my 40% off coupon (in most Sunday papers as well as by email when you sign up on the website) on something else that trip, or I could have gotten it for about $3! There were four different shaped in the package, I used two of the four and have enough left over to make a spring time one too! YAY!
 What you need:
wooden blocks (you decide what you want to spell out and that will determine how many blocks you need)
scrapbook paper (a few different coordinating patterns)
craft glue
water
sponge brush
heavy duty glue (super glue, gorilla glue...something more than elmers)
letters (I chose to paint mine you can use scrapbook stickers, markers, or if you are lucky enough to own a Cricut machine that would come in handy!)
What to do:
I chose to use the 4x4 and the 4x3 blocks of wood. So, I cut down the scrapbook pages to size. I chose two different patterns and wanted to alternate them. I also chose to alternate the size of the blocks because I wanted to attach them to make one piece. You could very easily just leave the blocks separate and they would look just as good.
I then mixed up a cup of my 'make shift modge podge' (click the link to read more about that) and decoupaged the scrapbook paper onto the blocks.
I let all that dry, after putting a few coats of the glue mixture on (about 30 minutes or so will do)
Then, I painted on the letters of the word I was writing...LOVE! I let that paint dry and then did another coat of the glue mixture.
I wanted the blocks to be connected as a line rather than apart for this project. However, if you want them separate then by all means leave them that way...it's your project! I used Gorilla glue to bond the blocks together. Every glue is different, so be sure you follow the directions. I had to wet down the wooden surface, apply the glue then clamp it down (my husbands big Starbucks mug worked as a wonderful weight).
One thing I haven't done yet that I plan on doing it covering the edges with ribbon. I thought I had the right size ribbon but I do not. I was so excited and wanted to share it with you so...sorry for the rough edges. Also, on Dittle Dattle she sanded the edges of the blocks. I really did like that idea, I just chose not to do it for my blocks. There is no right or wrong way to make your project a success!
a breakthrough

We were at Winn Dixie (we love their buy one get one deals) and my husband found his espresso coffee in instant coffee form. He uses Cafe Bustello and I know nothing about coffee but, he says it's a stronger, better one.
I used that this time in place of the espresso powder and he loved it! I mean, he ate five cheesecake cupcakes in the three hours before we went to work. Just wanted to share my little find with my faithful bloggies!
Oh, and if you wonder why I always make my cheesecake in cupcake form, it's because I do not have a spring form pan yet. I am planning on getting one sometime with a 40% off coupon but, just haven't yet.
1.12.2011
I'm begging...
no honestly...as I write this I am on my knees, hands joined under my chin...BEGGING! Ok, maybe not that far but, pretty close. I just have a favor to ask of you. I know, I know...I ask so much!
Well, I've told you about Shutterfly and how much I absolutely LOVE it! I also shared the gift I made using Shutterfly for my mom, the recipe book of all her favorite holiday recipes and family pictures to go along with them. Well you see, Shutterfly is having a contest for the best gift ever. I've entered that gift into the contest and now I just need votes! So...if you'd be so sweet as to click the little button below and vote for my project I would LOVE LOVE LOVE it and LOVE LOVE LOVE you more!
Remember, you can vote once a day so...do it! Also, if you sign up for a new Shutterfly account you will get 25 free 4x6 prints credited to your account!
Thank you my sweet bloggies!
1.09.2011
update
Hey bloggies! Here I am, once again apologizing for letting you down...I know how poorly your day goes when you don't get to read my ramblings!
I promise, I have a good excuse! Well, you see...I have this little dream on being an event and wedding planner and coordinator. Today, I did my first wedding as a day-of-coordinator. How exciting! I just wanted to share a few pics with you, because I am so doggone excited about it!

For ceremony was held at The University Club in downtown Jacksonville. The rather swanky club is on the 27th floor of the Riverplace Tower and looks out over the city. It was a beautiful!
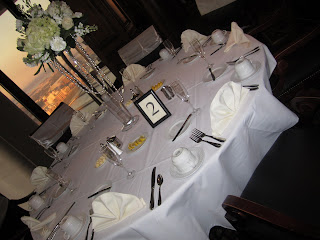
The florists did a beautiful job on the table arrangements!

The wedding was just in time to see the sunset and then the city lights came on!

See that, I'm a vendor! Oh yeah!
Oh yeah, I went to Michael's last night and used up all my gift card, all my coupons and then some! I have a project that I will be doing tomorrow when I get home from church. Don't you give up on me just yet my faithful bloggies...I've still got a whole lot of craft in me!
Subscribe to:
Posts (Atom)