A childhood friend contacted me through Facebook and inquired about me creating some wedding hair accessories for her big day. Of course, I was like "heck yes!" She showed me a picture of one she had seen in David's Bridal for a whopping $50 a pop! What? It absolutely irks me that businesses will hike up prices when they add 'wedding' or 'bridal' to a title knowing that people will pay the completely outrageous price because the sales people will sell them the line 'it's your special day, you deserve it'...you DO deserve it, but at a fair price! Whew...got that little rant session over with...now onto the post!
I took one look at the picture and knew that it would be a piece of cake...wedding cake, maybe?! Keep reading to see how I did it!
Showing posts with label crafts. Show all posts
3.22.2011
3.21.2011
nice (luggage) rack
In this past weeks 'Thrifty Thursday' I showed you my directors chair turned luggage rack.
Today, I am going to show you just how I made this happen. I must say I am quite pleased with the outcome of my project...and it took less than 45 minutes!
Here's how I did it...
Today, I am going to show you just how I made this happen. I must say I am quite pleased with the outcome of my project...and it took less than 45 minutes!
Here's how I did it...
2.18.2011
hanging in there
My best friend went to Japan a few summers ago with her then boyfriend (he's her fiance now!) to visit his family and she brought me back a handkerchief that I loved! It was red (favorite color) with big graphic flowers on it...just the right amount of oriental-ness and vintage-esque for me to fall in love with. Well, I never quite knew what to do with it. I mean, I'm not the type to carry a hankie in my purse and I certainly didn't want to mess it up.I was stuck. So, the sweet handkerchief sat in my craft cart for a while.
Then one day a few weeks ago, a light bulb went off in my head! I was in need of a place to hang my necklaces...they were hanging in clear thumbtacks at the time. So, I used the handkerchief to make an awesome jewelry holder.
1.16.2011
cookin' up something pretty
This year my mom asked for only two things, a new apron and a bunt cake pan. She made the comment to me once that she will probably wind up getting three of each (since she told me two sisters and I the same two things she wanted)! She asked specifically for a Vera Bradley apron and, both of my sisters wound up buying it for her. I knew this was going to happen so what did I do? I made her one! Now, it's no Vera Bradley...but it is made with love for my momma!
I am going to show you how I made the skirt for my moms apron. As I told you before, I do not do well with patterns so, I always have to make something twice before I can tell you how I did it. I whipped one up for myself and wanted to share it with you.
(for reference, on my project fabric 1 = orange plaid, fabric 2 = brown floral. Feel free to do whatever patterns or colors you want)
You will need:
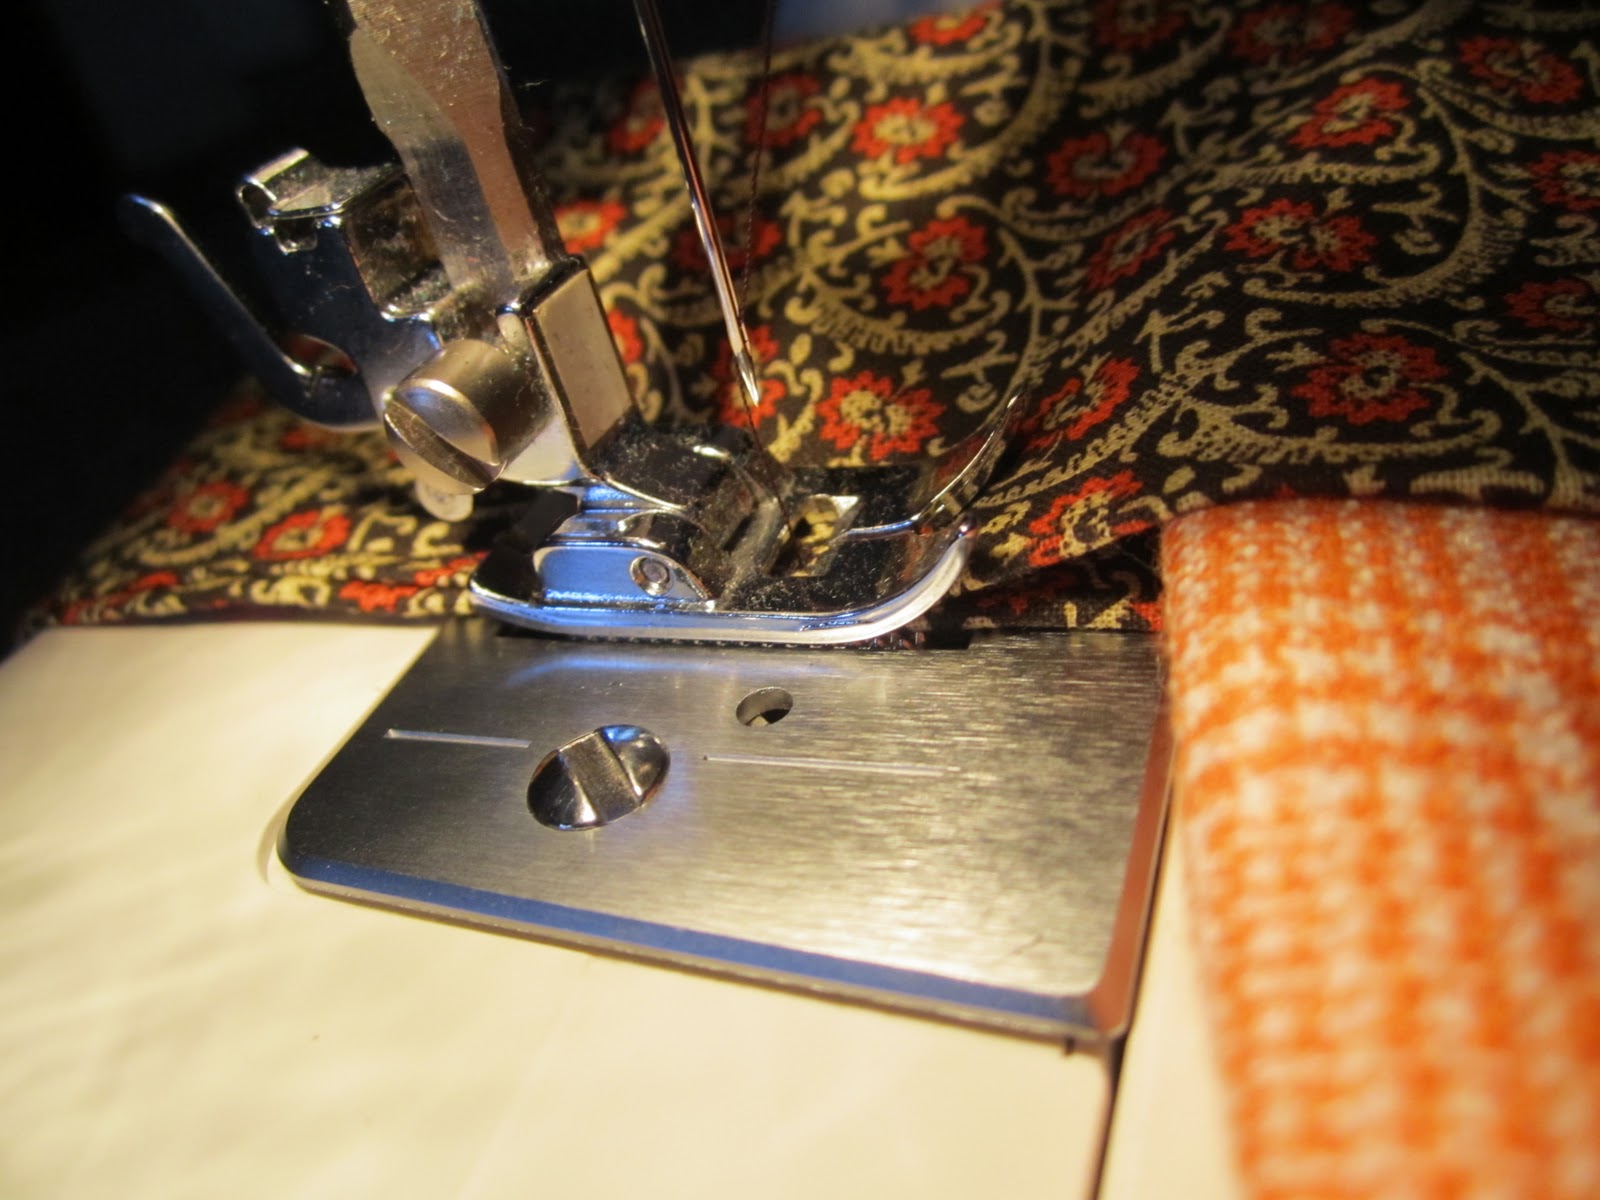
2 rectangles of fabric 1 approximately 20" x 13" (Hold a measuring tape up to you and see if you need it larger or smaller...use what works best for you!)
1 rectangle of fabric 2 approximately 6" x 60" (You will fold the rectangle in half giving you a 3" band, if you want a different size, adjust to your liking) The fabric I used was only 45", so I cut another 15" and sewed them together
Sewing machine
Coordinating thread
Any embellishments you like (I used my no sew flowers and minimal sewing flowers) I also added a little ruffle to the bottom, I will show you that tomorrow, this tutorial is for a SUPER simple apron.
Also optional - If you want to customize the apron a little more with pockets or painting with a stencil maybe, do this to one of the rectangles of fabric one before you sew them together.
Lay the two pieces of fabric one down with the pattern facing each other. Sew around the bottom and two sides, leaving the top open to turn it right side out. Turn the rectangle right side out
Take the large rectangle of fabric two and iron it in half long ways as well as ironing a hem on each side. You don't have to iron it but, it makes it a million times easier then trying to make sure you have it pinned perfectly in place the whole time.
Take the right side out rectangle of fabric one and place it between fabric two. Be sure to center it so that you have the same amount of fabric on either side of the rectangle of fabric one. Pin the fabrics together
Sew the rectangle of fabric two closed, going straight down the strip of fabric. This will close the band and attach your skirt.
And there you have it!! A sweet and simple apron perfect for everything! Now, add your embellishments as you wish. Remember, I will show you how to add the ruffle tomorrow. I LOVE my apron with my cute little flowers!
![]()
” />
I am going to show you how I made the skirt for my moms apron. As I told you before, I do not do well with patterns so, I always have to make something twice before I can tell you how I did it. I whipped one up for myself and wanted to share it with you.
(for reference, on my project fabric 1 = orange plaid, fabric 2 = brown floral. Feel free to do whatever patterns or colors you want)
You will need:
2 rectangles of fabric 1 approximately 20" x 13" (Hold a measuring tape up to you and see if you need it larger or smaller...use what works best for you!)
1 rectangle of fabric 2 approximately 6" x 60" (You will fold the rectangle in half giving you a 3" band, if you want a different size, adjust to your liking) The fabric I used was only 45", so I cut another 15" and sewed them together
Sewing machine
Coordinating thread
Any embellishments you like (I used my no sew flowers and minimal sewing flowers) I also added a little ruffle to the bottom, I will show you that tomorrow, this tutorial is for a SUPER simple apron.
Also optional - If you want to customize the apron a little more with pockets or painting with a stencil maybe, do this to one of the rectangles of fabric one before you sew them together.
Lay the two pieces of fabric one down with the pattern facing each other. Sew around the bottom and two sides, leaving the top open to turn it right side out. Turn the rectangle right side out
Take the large rectangle of fabric two and iron it in half long ways as well as ironing a hem on each side. You don't have to iron it but, it makes it a million times easier then trying to make sure you have it pinned perfectly in place the whole time.
Take the right side out rectangle of fabric one and place it between fabric two. Be sure to center it so that you have the same amount of fabric on either side of the rectangle of fabric one. Pin the fabrics together
Sew the rectangle of fabric two closed, going straight down the strip of fabric. This will close the band and attach your skirt.
And there you have it!! A sweet and simple apron perfect for everything! Now, add your embellishments as you wish. Remember, I will show you how to add the ruffle tomorrow. I LOVE my apron with my cute little flowers!
1.14.2011
with the band
For Christmas my little sister asked for an arm band for her Ipod touch. My husband and I both have an Ipod touch as well and he has an arm band for when he works out. One night I decided I would use it at work...yeah, that didn't happen. It was too big for my arm. I admit, I have small arms (trust me, this grass is no greener than yours) so the arm band literally slid down to my wrist. I was frustrated. When my little sister asked for one, I knew there was NO WAY a normal one would fir her, she has smaller arms than I do. So, I said my famous phrase "I can make that" and did!
I am so sorry I haven't posted this earlier, you see when I made something I make it with no pattern. So, the first one is usually the trial, seeing what works best. The second one I make is the one that I really know what I'm doing and can explain. I had no reason to make a second arm band...until now! My little sisters friend asked for one, so I said 'of course, I need to share this with my bloggies'!
Fabric 1: Zebra
Fabric 2: Green
What you need:
Cut out of Fabric 1:
(2) 5 1/4 x 6 1/2 inch - we'll call these smaller panels
(2) 5 1/4 x 7 1/2 inch - we'll call these larger panels
Cut out of Fabric 2:
(4) 6 x 2 inch - we'll call these arm bands
Other stuff you need
2 inch velcro strip
4 inch velcro strip
Sewing machine
Coordinating thread
What to do:
First sew the two smaller panels together as you would a pillow (pattern facing pattern, inside out) leaving one side unsewn, this will be the bottom. Turn the finished panel right side out
Next, sew one side of the 2 inch strip of velcro onto the middle of the top of one of the larger panels. Sew the two larger panels together as you did the smaller panels, leaving the bottom unsewn. Turn the finished panel right side out
Sew the second side of the 2 inch strip of velcro onto the middle of the top of the finished smaller panel.
Set your two finished panels aside.
Sew one strip of the 4 inch velcro to one end of one of the arm bands. Sew one of the unused arm bands to the newly velcro-ed arm band as you would a pillow, leaving the bottom unsewn. Turn the newly finished arm band right side out. Do the same for the second strip of 4 inch velcro. Continue to make the second finished arm band.
Clasp the two arm bands together using the velcro. Lay the larger finished panel down with the velcro facing up.
Lay the smaller finished panel on top of the larger finished panel also with the velcro facing up.
Place the clasped arm bands between the two panels, centering on one side (one side of the clasped arm bands will be sticking out a lot, but we will take care of that).
Stitch down the side you centered the bands on and then across the bottom of the panels.
Now, tuck the end of the arm bands that is sticking out a lot into the pouch you just made. Be sure to leave a small amount hanging out to attach.
Stitch up this side as well.
Turn your case right side out.


I am so sorry I haven't posted this earlier, you see when I made something I make it with no pattern. So, the first one is usually the trial, seeing what works best. The second one I make is the one that I really know what I'm doing and can explain. I had no reason to make a second arm band...until now! My little sisters friend asked for one, so I said 'of course, I need to share this with my bloggies'!
Fabric 1: Zebra
Fabric 2: Green
What you need:
Cut out of Fabric 1:
(2) 5 1/4 x 6 1/2 inch - we'll call these smaller panels
(2) 5 1/4 x 7 1/2 inch - we'll call these larger panels
Cut out of Fabric 2:
(4) 6 x 2 inch - we'll call these arm bands
Other stuff you need
2 inch velcro strip
4 inch velcro strip
Sewing machine
Coordinating thread
What to do:
First sew the two smaller panels together as you would a pillow (pattern facing pattern, inside out) leaving one side unsewn, this will be the bottom. Turn the finished panel right side out
Next, sew one side of the 2 inch strip of velcro onto the middle of the top of one of the larger panels. Sew the two larger panels together as you did the smaller panels, leaving the bottom unsewn. Turn the finished panel right side out
Sew the second side of the 2 inch strip of velcro onto the middle of the top of the finished smaller panel.
Set your two finished panels aside.
Sew one strip of the 4 inch velcro to one end of one of the arm bands. Sew one of the unused arm bands to the newly velcro-ed arm band as you would a pillow, leaving the bottom unsewn. Turn the newly finished arm band right side out. Do the same for the second strip of 4 inch velcro. Continue to make the second finished arm band.
Clasp the two arm bands together using the velcro. Lay the larger finished panel down with the velcro facing up.
Lay the smaller finished panel on top of the larger finished panel also with the velcro facing up.
Place the clasped arm bands between the two panels, centering on one side (one side of the clasped arm bands will be sticking out a lot, but we will take care of that).
Stitch down the side you centered the bands on and then across the bottom of the panels.
Now, tuck the end of the arm bands that is sticking out a lot into the pouch you just made. Be sure to leave a small amount hanging out to attach.
Stitch up this side as well.
Turn your case right side out.

1.13.2011
L is for...
LOVE...duh! I told you I had some Valentines projects in the works and I finally finished the first one! I saw this idea on a blog that I read called Dittle Dattle, she did a spring time version. She also used old wall molding she had left over...I did not. I went to Micheal's and got a package of 20 different wooden plaques (squares) for $5! I used my 40% off coupon (in most Sunday papers as well as by email when you sign up on the website) on something else that trip, or I could have gotten it for about $3! There were four different shaped in the package, I used two of the four and have enough left over to make a spring time one too! YAY!
What you need:
wooden blocks (you decide what you want to spell out and that will determine how many blocks you need)
scrapbook paper (a few different coordinating patterns)
craft glue
water
sponge brush
heavy duty glue (super glue, gorilla glue...something more than elmers)
letters (I chose to paint mine you can use scrapbook stickers, markers, or if you are lucky enough to own a Cricut machine that would come in handy!)
What to do:
I chose to use the 4x4 and the 4x3 blocks of wood. So, I cut down the scrapbook pages to size. I chose two different patterns and wanted to alternate them. I also chose to alternate the size of the blocks because I wanted to attach them to make one piece. You could very easily just leave the blocks separate and they would look just as good.
I then mixed up a cup of my 'make shift modge podge' (click the link to read more about that) and decoupaged the scrapbook paper onto the blocks.
I let all that dry, after putting a few coats of the glue mixture on (about 30 minutes or so will do)
Then, I painted on the letters of the word I was writing...LOVE! I let that paint dry and then did another coat of the glue mixture.
I wanted the blocks to be connected as a line rather than apart for this project. However, if you want them separate then by all means leave them that way...it's your project! I used Gorilla glue to bond the blocks together. Every glue is different, so be sure you follow the directions. I had to wet down the wooden surface, apply the glue then clamp it down (my husbands big Starbucks mug worked as a wonderful weight).
One thing I haven't done yet that I plan on doing it covering the edges with ribbon. I thought I had the right size ribbon but I do not. I was so excited and wanted to share it with you so...sorry for the rough edges. Also, on Dittle Dattle she sanded the edges of the blocks. I really did like that idea, I just chose not to do it for my blocks. There is no right or wrong way to make your project a success!
What you need:
wooden blocks (you decide what you want to spell out and that will determine how many blocks you need)
scrapbook paper (a few different coordinating patterns)
craft glue
water
sponge brush
heavy duty glue (super glue, gorilla glue...something more than elmers)
letters (I chose to paint mine you can use scrapbook stickers, markers, or if you are lucky enough to own a Cricut machine that would come in handy!)
What to do:
I chose to use the 4x4 and the 4x3 blocks of wood. So, I cut down the scrapbook pages to size. I chose two different patterns and wanted to alternate them. I also chose to alternate the size of the blocks because I wanted to attach them to make one piece. You could very easily just leave the blocks separate and they would look just as good.
I then mixed up a cup of my 'make shift modge podge' (click the link to read more about that) and decoupaged the scrapbook paper onto the blocks.
I let all that dry, after putting a few coats of the glue mixture on (about 30 minutes or so will do)
Then, I painted on the letters of the word I was writing...LOVE! I let that paint dry and then did another coat of the glue mixture.
I wanted the blocks to be connected as a line rather than apart for this project. However, if you want them separate then by all means leave them that way...it's your project! I used Gorilla glue to bond the blocks together. Every glue is different, so be sure you follow the directions. I had to wet down the wooden surface, apply the glue then clamp it down (my husbands big Starbucks mug worked as a wonderful weight).
One thing I haven't done yet that I plan on doing it covering the edges with ribbon. I thought I had the right size ribbon but I do not. I was so excited and wanted to share it with you so...sorry for the rough edges. Also, on Dittle Dattle she sanded the edges of the blocks. I really did like that idea, I just chose not to do it for my blocks. There is no right or wrong way to make your project a success!
1.05.2011
cleverly disguised
You may remember the pillows I made for our couch and love seat out of place mats and napkins. Well, I love them and we still use them however, they have fall leaves on them. It's just a tad bit past the season for fall leaves! I wanted to change the pillows somehow but didn't want to buy all new ones and more stuffing.
I was reading my friend Mary's blog one day and she had a tutorial for making pillow slipcovers, the kind that overlap in the back like pillow shams. How perfect!
I had bought some fabric at Wal-Mart not too long ago, and I decided to use it.
What you need:
Sewing machine
Fabric
Tape Measure
How to make it:
Determine the size you need to cut the fabric down to. To calculate this measure the pillow from seam to seam (you are measuring half of the pillow) Mine was 13 inches by 18 inches. Next, multiply the width by two, (13 x 2 = 26) add about an inch and a half to allow for seams (26 + 1.5 = 27.5) then add four inches, this will be the overlap (27.5 + 4 = 31.5). For the length add about an inch for seams, which came out to 19 inches for me. All righty, now that the math is over my fabric was 19 inches by 31.5 inches.
Next, you want to hem the edges that will be seen because of the flaps. That will be the shorter of the two sides.
Lay the piece of fabric with the hem facing up (as pictured) and fold one side in and then the other on top of it. I knew that I needed it to be 13 inches on each side. I measured and adjusted the folds to get the right size.
I then pinned the folds down and stitched straight down the two sides.
Now, turn the pillow slipcover right side out and voile!
Stuff your pillow in your slipcover and you are done!
A simple and quick little face lift for your pillows. I want to stencil something on the pillows but I am not sure what just yet. I will be sure to keep you updated on what I decide to do.
Oh, and thanks Mary for the tutorial!
I was reading my friend Mary's blog one day and she had a tutorial for making pillow slipcovers, the kind that overlap in the back like pillow shams. How perfect!
I had bought some fabric at Wal-Mart not too long ago, and I decided to use it.
What you need:
Sewing machine
Fabric
Tape Measure
How to make it:
Determine the size you need to cut the fabric down to. To calculate this measure the pillow from seam to seam (you are measuring half of the pillow) Mine was 13 inches by 18 inches. Next, multiply the width by two, (13 x 2 = 26) add about an inch and a half to allow for seams (26 + 1.5 = 27.5) then add four inches, this will be the overlap (27.5 + 4 = 31.5). For the length add about an inch for seams, which came out to 19 inches for me. All righty, now that the math is over my fabric was 19 inches by 31.5 inches.
Next, you want to hem the edges that will be seen because of the flaps. That will be the shorter of the two sides.
Lay the piece of fabric with the hem facing up (as pictured) and fold one side in and then the other on top of it. I knew that I needed it to be 13 inches on each side. I measured and adjusted the folds to get the right size.
I then pinned the folds down and stitched straight down the two sides.
Now, turn the pillow slipcover right side out and voile!
Stuff your pillow in your slipcover and you are done!
A simple and quick little face lift for your pillows. I want to stencil something on the pillows but I am not sure what just yet. I will be sure to keep you updated on what I decide to do.
Oh, and thanks Mary for the tutorial!
1.03.2011
stop in the name of warmth
I found a post on a blog a while back on how to make your own draft stopper. I was quite intrigued seeing as how we do not live in the most updated of apartments. Our windows are not sealed so great and it's just all together not an energy efficient apartment. We've tried to use this to our advantage as much as we can, leaving the windows open on cool nights (we live on the second floor, so it's safe!), leaving the heater off on chilly nights and bundling up with blankets. It really has helped out on our electric bill. However, now that the temperature is dropping down quite drastically that just isn't going to work.
What you need:
heavy fabric (I used an old pair of sweat pants, could get a few out of these)
Fiber-fill (the stuff you stuff inside pillows)
Small Scraps of fabric (to make bags for inside, no one will see)
Beans, pebbles or anything to weigh down the draft stopper
Needle and thread or a sewing machine (this is a super simple project, I used my sewing machine but, you could easily stitch this by hand)
What to do:
Cut a piece of fabric that is about four inches longer than the width of your door and about ten inches wide. I used sweat pants, so I pretty much just used one leg of the pants.
Sew the long ends of the piece together, inside out. This will make an inside out tube of the fabric strip.
Make small bags out of the small scraps of fabric leaving one side open. Fill the bag with the beans or rocks. I used pea gravel I got from the Dollar tree and didn't even use half...more supplies for later crafts! YAY!
Sew the little, filled bags closed by stitching the top. Remember, these bags can be as ugly as homemade sin (that's country for REALLY ugly) and it won't matter because no one will see, them. The bags are just to weigh down the stopper from the inside.
With the tube still inside out, sew one bag to the end of one side of the tube. Sew closed the end you attach the baggie to.
Turn the tube right side out and fill with the fiber-fill. I bought the biggest pillow I could find at Goodwill for less than $3, cut it open and used that filling rather than buying all new filling. I didn't even use half of the filling form the pillow.
Finally, attach the second bag to the inside of the not yet sewn end of the tube and sew shut that end as well.
There you have it...your very own draft stopper.
It took me about twenty minutes to make mine. Granted, it isn't the absolute best looking thing I have ever made but, it's only going to be on the floor. Plus, the price is quite appealing...less than $5 with supplies left over!! You could certainly dress up this project with some prettier fabric, maybe some stenciling, stitching something with colored thread, an applique...whatever you want.
What you need:
heavy fabric (I used an old pair of sweat pants, could get a few out of these)
Fiber-fill (the stuff you stuff inside pillows)
Small Scraps of fabric (to make bags for inside, no one will see)
Beans, pebbles or anything to weigh down the draft stopper
Needle and thread or a sewing machine (this is a super simple project, I used my sewing machine but, you could easily stitch this by hand)
What to do:
Cut a piece of fabric that is about four inches longer than the width of your door and about ten inches wide. I used sweat pants, so I pretty much just used one leg of the pants.
Sew the long ends of the piece together, inside out. This will make an inside out tube of the fabric strip.
Make small bags out of the small scraps of fabric leaving one side open. Fill the bag with the beans or rocks. I used pea gravel I got from the Dollar tree and didn't even use half...more supplies for later crafts! YAY!
Sew the little, filled bags closed by stitching the top. Remember, these bags can be as ugly as homemade sin (that's country for REALLY ugly) and it won't matter because no one will see, them. The bags are just to weigh down the stopper from the inside.
With the tube still inside out, sew one bag to the end of one side of the tube. Sew closed the end you attach the baggie to.
Turn the tube right side out and fill with the fiber-fill. I bought the biggest pillow I could find at Goodwill for less than $3, cut it open and used that filling rather than buying all new filling. I didn't even use half of the filling form the pillow.
Finally, attach the second bag to the inside of the not yet sewn end of the tube and sew shut that end as well.
There you have it...your very own draft stopper.
It took me about twenty minutes to make mine. Granted, it isn't the absolute best looking thing I have ever made but, it's only going to be on the floor. Plus, the price is quite appealing...less than $5 with supplies left over!! You could certainly dress up this project with some prettier fabric, maybe some stenciling, stitching something with colored thread, an applique...whatever you want.
12.28.2010
freezer paper Christmas
This Christmas I went a wee little bit crazy with my freezer paper stencils. I LOVE them! I made a bag for my mother-in-law and three sisters-in-law as well as a freezer paper stenciled shirt for my sweet niece. I am so addicted to these babies! I just wanted to share with you the most wonderful and simplest personalization trick. I showed you here how to make a freezer paper stencil (read up quickly...we'll wait for you). I just bought a pack of three canvas bags from Wal-Mart, I actually got two sets. Once I got home I found clip art online that I wanted to use and used Microsoft Word to print out the letters and names.
I found an ornate princess crown for my sister-in-law who loves Disney Princess'. I used pink and white and gradually lightened the color by adding more and more white to the pink. Now, this stencil took me quite a while to cut out but, I think it was well worth it!
I found a simple Fleur de lis for one of my sisters-in-law, I graduated from teal to purple doing the same as I did with the pink. I decided to stencil the first letter of her name in bronze. To do this, I waited for the Fleur de lis to dry completely and then started the stencil process over again.
and a polka dot pattern in University of Florida colors for my seventeen year old sister-in-law. Again, I did the polka dots first, waited for them to dry completely and stenciled the name on.
I then found a stylized letter K for my mother-in-law.
For my niece, I found a hand making the sign language sign for 'I love you'. She is deaf and I knew this would mean a lot to her, I then just printed her name to put underneath the hand. Now she can wear a declaration of our love for her!
I put a little something special in each bag for the ladies then wrapped them up and delivered them for Christmas! I was so pleased with how they all turned out. It never seems to amaze me when I full my freezer paper stencil off....it's like magic every time! It's so easy to make personalized gifts this way and especially for those people with unique or hard to find names.
I found an ornate princess crown for my sister-in-law who loves Disney Princess'. I used pink and white and gradually lightened the color by adding more and more white to the pink. Now, this stencil took me quite a while to cut out but, I think it was well worth it!
I found a simple Fleur de lis for one of my sisters-in-law, I graduated from teal to purple doing the same as I did with the pink. I decided to stencil the first letter of her name in bronze. To do this, I waited for the Fleur de lis to dry completely and then started the stencil process over again.
and a polka dot pattern in University of Florida colors for my seventeen year old sister-in-law. Again, I did the polka dots first, waited for them to dry completely and stenciled the name on.
I then found a stylized letter K for my mother-in-law.
For my niece, I found a hand making the sign language sign for 'I love you'. She is deaf and I knew this would mean a lot to her, I then just printed her name to put underneath the hand. Now she can wear a declaration of our love for her!
I put a little something special in each bag for the ladies then wrapped them up and delivered them for Christmas! I was so pleased with how they all turned out. It never seems to amaze me when I full my freezer paper stencil off....it's like magic every time! It's so easy to make personalized gifts this way and especially for those people with unique or hard to find names.
12.13.2010
cheer in a stitch
Being that this is the first year I am in my own place for Christmas, I needed a stocking. I, of course had one at my parents house but, I wasn't going to be able to get it before Christmas. I decided that I would make stockings for my husband and I. I was somewhat nervous and put it off for a while. However, I finally did it and I am quite pleased with the outcome.
First I folded my selected main fabric (black) in half and drew a stocking on the back. I then cut out the stocking shape with the fabric still folded in half. I did this so that I would have both the front and the back of my stocking. I then cut a strip of contrasting fabric (orange) a little longer than double the length of the top of my stocking. My super specific (complete sarcasm) measurements were taken by laying the two pieces for my stocking back to back and marking the length on the back of my contrasting fabric.
Then I hemmed the contrasting fabric on the bottom by folding a small portion backwards and sewing it with a simple stitch. After the trim was hemmed I folded it in half hamburger style...not longways. When folding the fabric I ironed down the fold, it made it much easier to sew.
Next I stacked the folded contrasting fabric between the two stockings in the main fabric. Make sure that the patterned sides of the fabric are facing each other. You want to sew the stockings inside out so that when turned right side out you will not see the stitching.
I then stitched straight down the heel side of the stacked stocking. I opened up the stocking so that it was no longer stacked. I turned the unfolded stocking over so that the non patterned side was facing up. I made a hem at the top of the stocking just like I had done with the bottom of the contrasting fabric.
I then folded the stocking back as it was and finished sewing around the edges. Now, be sure NOT to sew the top of the stocking...or you will have a closed up, inside out stocking! Once you have all sides except for the top sewn up, turn the stocking right side out.
Then I hemmed the contrasting fabric on the bottom by folding a small portion backwards and sewing it with a simple stitch. After the trim was hemmed I folded it in half hamburger style...not longways. When folding the fabric I ironed down the fold, it made it much easier to sew.
Next I stacked the folded contrasting fabric between the two stockings in the main fabric. Make sure that the patterned sides of the fabric are facing each other. You want to sew the stockings inside out so that when turned right side out you will not see the stitching.
I then stitched straight down the heel side of the stacked stocking. I opened up the stocking so that it was no longer stacked. I turned the unfolded stocking over so that the non patterned side was facing up. I made a hem at the top of the stocking just like I had done with the bottom of the contrasting fabric.
I then folded the stocking back as it was and finished sewing around the edges. Now, be sure NOT to sew the top of the stocking...or you will have a closed up, inside out stocking! Once you have all sides except for the top sewn up, turn the stocking right side out.
There you have it. One stocking made in less than half an hour. The cost you may wonder...about $4! I only bought a 1/2 yard of the main fabric and a 1/4 yard of the contrasting fabric. However, I could have gotten away with 1/3 yard of the main fabric. Once you have your stocking made you may want to personalize your stockings. I painted the name on this stocking using a freezer paper stencil. I LOVE this technique! From start to finish, first cut to hanging on the wall...it took me about 45 minutes!
12.12.2010
a quick review
Ok, I just want to share a new tool I bought the other day and I am LOVING. It is a craft knife, but so much cooler. I used to have a craft knife that I used for scrapbooking. However, it is at my parents house about 200 miles away...I needed on a tad bit closer. I printed out a 50% off one item coupon for A.C. Moore. To easily find coupons just type 'printable coupons for ____' (fill in with the name of your favorite craft store) and find one that has not expired. I put my blinders on and headed into A.C. Moore...I only needed one thing...I was going to head right to that isle get what I needed and leave. YEAH RIGHT! After about half an hour of wandering around aimlessly and looking at everything they have and thinking of all the crafts I'd like to do, I remembered what I came for. I made it to the scrapbooking section and over to the cutters. They had so many! I found the craft knifes I had planned on getting. It looked like this:
Then something else caught my eye...a cute little cutter with a unique shape. It was called a fingertip cutter. I was delighted to see that the smaller, cuter one was cheaper!! It was only $5! I snatched up that baby and brought it home...eager to use it. After my coupon I paid a little over $2.50 for this cutter! Not too shabby, considering the larger ones were $10 and some even more than that. The fingertip cutter looked like this:
I bought it specifically to do my freezer paper stencils, so I jumped right into that! I was surprised at how easy the cutter was to use. Also, with it not being so long, it was easier to turn and I really did have better control over the blade. This cutter gets two thumbs up from this gal! If you're in the market for a new craft knife, or if you're thinking about picking one up...or really, if for any reason really....this is the way to go! Simple to use, easy to store and cute to look at...you can't go wrong!
a butchers best kept secret
For this project you will need:
Craft knife
Print Out of what you would like your stencil to look like
Pen or marker in a dark color
Craft Paint
Paint Brush
Iron
Step 1: trace onto the freezer paper (you should not be writing on the shiny side) the design you have printed out using the dark pen or marker.
Step 2: use the craft knife to cut out the pattern you have just traced onto the freezer paper. I cut on top of an old magazine so I didn't cut up our coffee table. Be sure to keep the insides of letters so that your letters aren't just blobs!
Step 3: use a warm (not hot) iron to iron on the stencil you now have. Don't forget those little inside parts of your letters or designs. Just a quick press will adhere the stencil. Make sure you have the stencil shiny side down.
Step 4: use the paintbrush to fill in the stencil with the paint of your choice. You can use fabric paint for projects dealing with fabric or just plain craft paint works just as well. You can get both kinds of paint at your local craft store.
Step 5: allow the paint to set for a few moments and then peel off the stencil. Now, this is a one time use stencil...but so worth it!
I can't believe how easy this is...it kills me that I didn't try this technique sooner. I love it and plan on using it for MANY different things.
Subscribe to:
Posts (Atom)